23 Nov

How to use Spells in DragonScales 7?

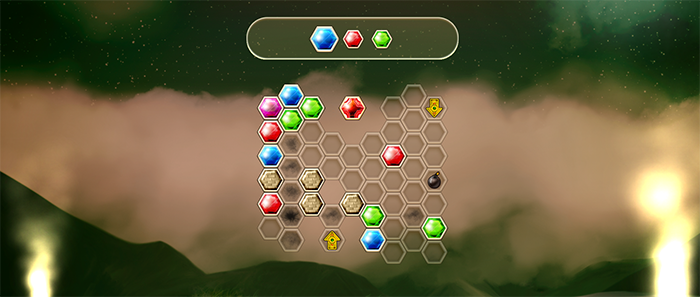
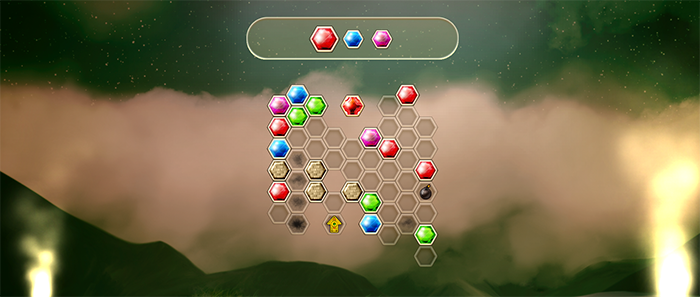
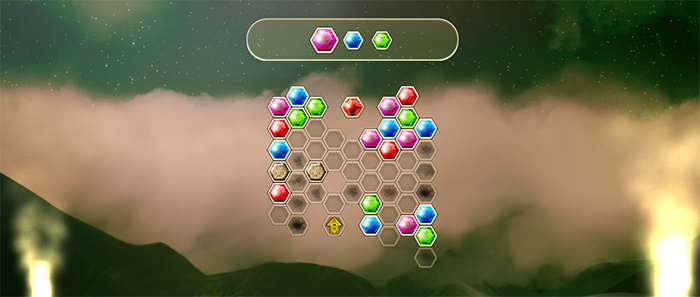
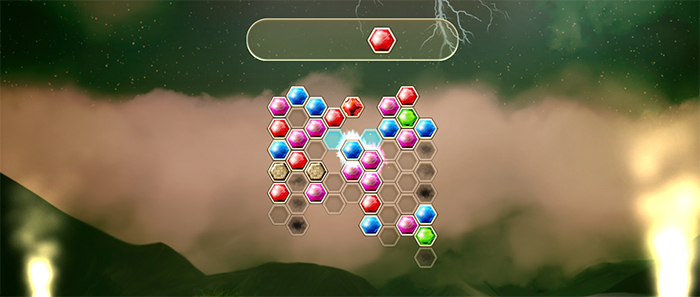
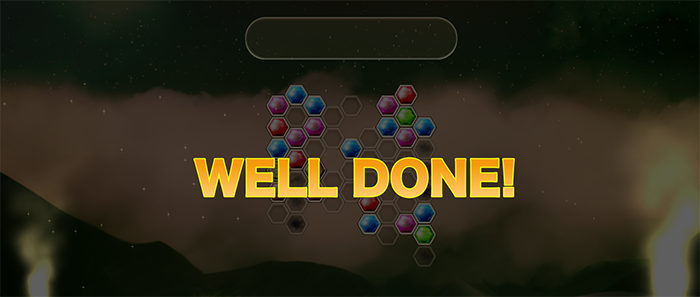
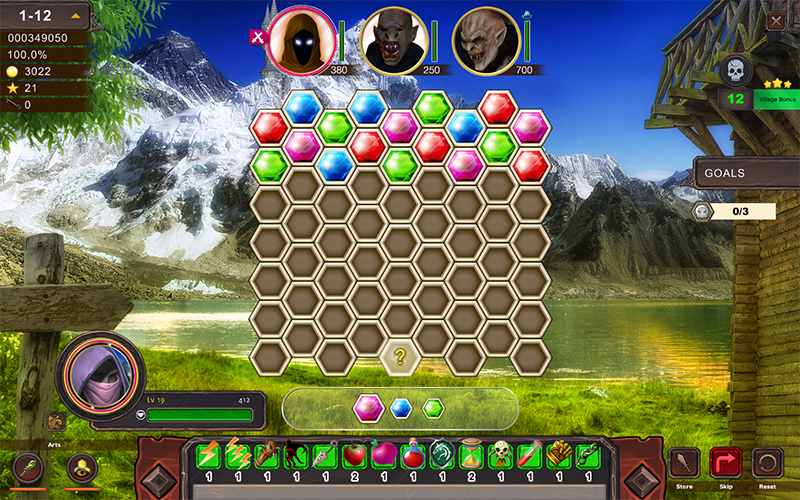
Spells are a new feature of DragonScales 7: A Heart of Dark Flames. You can have up to 14 spells, comprising attack, defensive and healing spells. Using a spell is really straightforward: just load the spell on any of your playable scales, place the scale on the board, and then simply make a combination which includes that scale you placed on the board (the scale with the spell.) All the spells are activated like this. Here’s a video showing the activation of a few spells in the battle of Level 1-12.

The lightning spell will be awarded just by progressing in the game. However, the other spells have to be retrieved from the question marks on the boards. They are hidden in those question marks. The Avenger’s shield, for instance, is hidden in a question mark of Level 2-6. Once you get a spell for the first time from those question marks you’ll be able to replenish it in the Store.
DragonScales 7 How to use spells
Replaying the battle of Level 1-12 with all the 14 spells

These are the 14 spells you can get in DragonScales 7:

  1. Lightning: Automatically received in Level 1-9. Cast a lightning spell on the enemy currently marked as target.
  2. Multi-lightning: Cast a lightning spell on all your enemies.
  3. Spiky Mace: Try to kill a random enemy. It’s a cheap spell but its success depends on luck. You can improve the “luck” of this spell by rising the attribute “Luck for Killing Spells” with your Stars. “Luck for Killing Spells” also improves a bit when the Avenger levels up.
  4. Dragon’s Claw: Kill the enemy with lowest Health Points (HP.) It always succeeds. However, it’s an expensive spell and a few enemies (the ones with the little blue crown, such as the rightmost enemy in the above image) are immune to it.
  5. Dagger: Reduce 1/4 of the Health Points (HP) of all susceptible enemies. Again, enemies with the blue crown are immune.
  6. Apple: Recover 30 HP of the Avenger.
  7. Turnip: Recover 2 HP of the Avenger per each scale on the board. Therefore, it’s wise to place plenty of scales on the board before activating this spell.
  8. Red Potion: Recover all the HP of the Avenger.
  9. Avenger’s shield: Guard from 3 enemy attacks. It protects from direct attacks only. A few enemies have attacks that can go past this shield.
  10. Sandglass: Extend turn. Similar to the effect you get if you rise the Rank of the Avenger’s Village. However, the extra turns you get via the Sandglass are temporal. The extra turns you get from the Village are permanent.
  11. Berserker mask: Destroy all the scales placed on the board.
  12. Arts filler: Fill up your arts. You have two arts: a magical rod to break a single scale, and prescience to replace your currently playable scales. Both arts charge up a bit when you make combinations. By using this spell you can entirely fill them up at once.
  13. Hand of Power: Double the power of your next 3 attacks. This is for scales attacks only. It’s not wise to mix this Spell with the lightning or killing spells. Remember you can use the Stars you get in the boards to improve the status of the Avenger. If you improve the “Power: Basic Scales Attack”, the damage caused by your basic attacks (the ones resulting from simply forming combinations on the board) will be higher. This Spell is perfect for those players who rise “Power: Basic Scales Attack”. Furthermore, sometimes you’ll see a CRITICAL message when you attack (it depends on luck). When you get a CRITICAL you cause double the damage. As with “Luck for Killing Spells” you can also improve your rate of criticals with “Luck for Critical Attack”. Strategically speaking, rising this “luck for critical” goes well with rising “Power: Basic Scales Attack” too, and with being a frequent user of the “Hand of Power” spell. It depends on your play style. For example, you can totally forget about this spell and rely only on lightning spells.
  14. Chains: Silence a random enemy. The silenced enemy won’t be able to attack for a while.

If you need further tips and explanations about DragonScales 7, here’s a fantastic and complete walkthrough of the game.

21 Nov

Localization in Unity with No Such Localization

Localization in Unity with No Such Localization is easy and truly convenient. We used that package to localize our game 10th Corpse into several languages, and it was a straightforward process. When the time came to localize our game, we evaluated the localization options available for Unity. The canon choice, so to speak, is Unity’s own Localization package which, however, required us to update our project and also, at that time, did not have an expedited installation (it had to be installed manually.) In the long run, Unity’s Localization package is likely to become the standard and the first choice of Unity developers, but for now it’s still at the preview stage.

For 10th Corpse, however, No Such Localization was a wise choice. In fact, No Such Localization offers much more than what we really needed to localize our game, which only required localization of strings. No images and no audio had to be localized in 10th Corpse, but if your project needs that, No Such Localization easily allows for it.

What is No Such Localization?

It’s a localization package for Unity, and it comes in 2 versions: Lite and Pro. Both versions are available in the Unity Asset Store. The Pro version (paid) offers even more features, such as support for Right-To-Left (RTL) languages (Hebrew, etc.), automatic variable replacement, and translation source classes for JSON and CSV files (more about this in a while.) Even the Lite version is awesome and, as told above, it offers much more than what our game’s localization required. No Such Localization integrates naturally with the Unity editor, and requires no coding unless you want to extend its functionality. And that’s the beauty of the package: its architecture, which makes it a breeze understanding and extending its functionality.

How to work with No Such Localization?

Let’s first understand the architecture of No Such Localization. The official documentantion is here and is very good. You’ll work with 3 classes of components. The most important of these components is the LocalizationService. It’s the core of your localization, and you should have a single instance in your scenes (ideally, use DontDestroyOnLoad to have single, persistent LocalizationService object if your project comprises multiple scenes.) Just create an empty object and append a LocalizationService component. Now, in the Locales list, add the languages you want to support, e.g., English and German. There are a few attributes, but you’ll be mostly changing Current Locale. Once you complete the localization process, modifying this Current Locale will immediately switch your project’s content to the localized strings and assets corresponding to such language.

So, main component: LocalizationService. We have yet to work with other two components: ComponentLocalizer and BaseTranslationSource. LocalizationService is our core, our hub, the ruler of all the localization of your game. However, it needs to know what scene’s objects (strictly speaking, components) it has to localize, and it also needs to know where it’s going to find the content with which it will localize those objects. For instance, let’s suppose you have a Text object (again, strictly speaking, an object with a Text component) displaying a “Welcome” string. The LocalizationService can automatically localize that object, but it needs to know that such object has to be localized (that’s the responsibility of ComponentLocalizer), and it needs to know what content it will use to localize the object (that’s the responsibility of BaseTranslationSource.) You can subclass both ComponentLocalizer and BaseTranslationSource to adapt them to the requirements of your project, but No Such Localization comes with classes that will suffice for basic requirements. For instance, the package includes a TextLocalizer component.

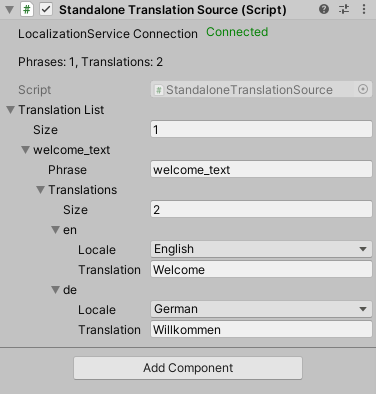
In continuation of our example, let’s add a TextLocalizer to our Text object having the “Welcome” string. You’ll notice that the TextLocalizer component has a Phrase attribute. When localizing, you’ll have to remove string literals (e.g., “Welcome”) from your components and replace them with unique IDs. The localization components will used those unique IDs to identify the content. Place unique IDs in that Phrase attribute, e.g., welcome_text. Now we need a Translation Source with an entry for that unique ID, welcome_text. The package comes with a very basic translation source, StandaloneTranslationSource which we can recur to for a simple use case like this. Create another object, add a StandaloneTranslationSource component, and edit its Translation List attribute to add welcome_text as an entry of such list, with translations for Locale English and Locale German.

Localization in Unity with No Such Localization
Translation List of a Standalone Translation Source

That’s all. All the components of No Such Localization will connect among them automatically, and if you go back to your LocalizationService component and change the Current Locale you’ll see your text component modifying its content accordingly. It’s like magic!

Of course, if your project is medium or large sized, working with the StandaloneTranslationSource can be tiresome and error-prone. You might want to read your content from a file (the Pro version of this component comes with translation sources for JSON and CSV files.) The wonderful thing about architecture of No Such Localization is that you can extend it as you wish (we created our own Translation Source class for 10th Corpse.) And you can also create your own ComponentLocalizer for your specialized widgets, for example. You can localize text, images, sound, etc. Further information in the official documentation. An excellent tool for localizing your Unity project!

15 Jan

“Hello world” with DEBUG

Coding “Hello world” with DEBUG will be a blunt exercise on programming futility. Or an exercise on retro, old-school coding. More than two decades ago I used to code in x86 (Intel) assembly, almost daily. I remember the masochist approach to learning the opcodes and the hardware architecture. The famous RBIL (Ralf Brown’s Interrupt List) was, back then, my favorite “reference”. First painful steps were taken and first crashes happily followed. I remember trying to code, as expected, the traditional “hello, world!”, using a strange tool included in DOS, DEBUG.COM. I wrote a post about this “hello, world” with DEBUG.COM elsewhere, and yesterday I found the time to reread it: I verified, first with awe, then with horror, and finally, with relief, that I had almost completely forgotten how to code in assembly. So I’ll revisit this here, mostly as a self-imposed disciplinary measure, an exercise on programming, specifically, an exercise on programming futility. Heck, DEBUG isn’t even available on the Windows 10 machine I’m typing this on. However, DEBUG looked pretty cool back then: it could assemble, disassemble and dump hexadecimal output. You could create little programs, or inspect programs and peek memory areas.

Specifically what I want is to build a minimal “hello, world!” program using DEBUG.COM. I don’t have any use for this, but it comes as a “relaxing” post after several weeks focused on the release of “DragonScales 3: Eternal Prophecy of Darkness” on Steam and the localization of “DragonScales 5: The Frozen Tomb”. After we execute DEBUG.COM we’ll meet a prompt with a “-” symbol. Now we can input our commands. I want to assemble, i.e., I want to type assembly language instructions. The command for that is “a”, which might be optionally followed by a memory address. By default, instructions will be placed starting from CS:0100, so I’ll use that address. Equivalently, I could type “a 0100” or “a 100” to achieve the same result.

-a

Now we have to place the data in memory. For this little program I only need the characters for “hello, world!!”. Notice I want two “!!” at the end. That’s because I want the final program to occupy exactly 32 bytes; we’ll see the reason for this later on. I’ll use the pseudo-instruction “DB” to define our string. With DB I can neatly provide the string using ASCII values, like this:

 db "hello, world!!"

Those are 14 bytes. However, I want a prettier output, with a newline character before and after our string. A newline is in fact two characters: a carriage return (CR is ASCII 13) and a line feed (LF is ASCII 10). In hexadecimal, CR is 0Dh, and LF is 0Ah. OK. Now our DB would be modified to look like this:

 db 0d,0a,"hello, world",0d,0a

Those are 18 bytes. We are not done yet with our data. In order to effectively print the message to the standard output I’ll recur to the function 09h of INT 21h. Check RBIL D-2109. In short, I have to place the value 09h in register AH, and DS:DX should point to the beginning of our string. The function will print every character until finding a “$” character (i.e., “$” acts as the “zero” in null-terminated C strings). ASCII value of “$” is 36, or 24 in hexadecimal. Therefore, we modify our DB instruction again:

 db 0d,0a,"hello, world",0d,0a,"$"
Read More
04 Dec

Render a Triangle with OpenGL

This post will discuss how to render a triangle with OpenGL. In the following, renderization of a triangle assumes modern OpenGL, i.e., the old, fixed-function pipeline is of no concern for us in this post, as we’ll be using OpenGL buffer objects and shaders.

A Simple Triangle

By following the tutorials in the previous posts (Setting up Eclipse CDT for OpenGL and the GLFW Example) we were able to create a minimal program displaying an empty window. Now we want to draw something with OpenGL on that window, specifically, a triangle. Why a triangle? Well, the geometric shape more frequently used to approximate surfaces is the triangle. Approximation of 3D surfaces in real-time graphics by means of simpler shapes is known as tessellation. For our tutorial purposes, a single triangle will suffice.

GPU Power

Modern GPUs are quite fast and can also have a considerable amount of dedicated memory. When rendering, we’d like for as much rendering data as possible to be read by the GPU directly from its local memory. In order to render a triangle with OpenGL we’ll need, obviously, to transfer the 3 vertices of the triangle to the GPU’s memory. However, we do NOT want our rendering to go like this:

  • read a vertex from our computer RAM
  • copy it to the GPU memory
  • let the GPU process that single vertex
  • and then repeat this whole process for the next vertex of the triangle.

Ideally, what we want is to transfer a batch of data to the GPU’s memory, copying all the triangle vertices, and then letting the GPU operate with this data directly from its local memory. In OpenGL we have the concept of Vertex Buffer Object (VBO) to represent these data placed on GPU’s memory.

The data to render the triangle in OpenGL

Normally, we think of a vertex as a point, which in 3D space leads to a representation with 3 coordinates, commonly designated by x, y and z. However, in this case I’d like to think of a vertex as a more abstract concept: a minimal data structure required to define a shape. Given a vertex, we can “link” attributes to it to further define our shape. Thereby, one of such attributes of a vertex can be its position (the “x, y, z values”.) Other attribute might be the vertex’s color. And so on. In this tutorial we will “link” two attributes to our vertices: position and color. For position we will have three coordinates, each a floating point value. If a float takes 4 bytes, then our position attribute would require 3 x 4 = 12 bytes. For the color attribute, we’d have 3 extra components, following the RGB model. Each color component would then take 4 bytes, and the color attribute would also require 12 bytes. In total, each vertex would take 24 bytes, 12 for its position attribute, and 12 for its color attribute.

Now we have to specify how to process these vertices.

Read More
03 Dec

GLFW Example

Here I’ll briefly discuss a tiny GLFW example. Previously, I explained how to setup Eclipse CDT to work with OpenGL, using GLFW and GLAD. However, I instructed to copy-paste the example code on GLFW Documentation page, without providing any details. In the following I’ll present some code that you can add to the little project of our setup post, and will include GLAD initialization too.

Read More
27 Nov

Setting up Eclipse CDT for OpenGL with GLFW and GLAD

What’s OpenGL?

OpenGL is an API to render 2D and 3D graphics. Remember that an API (Application Programming Interface) is an interface for interaction between components of a system. Typically, an API defines a set of functions, protocols and/or tools. I’ll skip the details about the client-server model, but OpenGL allows a client program to communicate with GPUs (Graphic Processing Units, e.g., your videocard) to achieve faster, hardware-accelerated rendering. That’s why OpenGL is a common topic in the game development scene.

OpenGL is focused on just rendering. It’s an API to write and read data from a framebuffer, and that’s it. It won’t handle user input, or sound playback, or loading a PNG image. It does not even have functions to create or close a window. We’ll need auxiliar libraries for all of that.

A minimal OpenGL window

So we want to build a minimal OpenGL application on Windows. We’ll create an empty window with an OpenGL context, using the GLFW and GLAD libraries. In the following, I assume we’re using a 64 bits version of Windows. I’ll also be relying on mingw-w64. In summary, these are our assumptions:

  • Windows operating system (64 bits.) Things will be a tad different for macOS and Linux users.
  • Eclipse CDT.
  • mingw-w64 to build GLFW from sources. Besides, our Eclipse CDT project will be compiled with the gcc version of mingw-w64.
  • GLFW and GLAD libraries.

What’s GLFW?

As told, OpenGL does not provide any facility to create a window, retrieve user input, create the OpenGL context, etc. These functionalities depend on the operating system. GLFW is a C library which provides a neat abstraction layer to handle all of this on several platforms. Notice that GLFW is focused on management of windows, OpenGL contexts, user input and time. It will not play sounds, or load images, etc.

Read More
27 Jun

DragonScales 4: A solution for Level 9-6

Level 9-6 of DragonScales 4: Master Chambers demands a high level of dexterity with the game’s strategies. In the following, we present a possible solution.

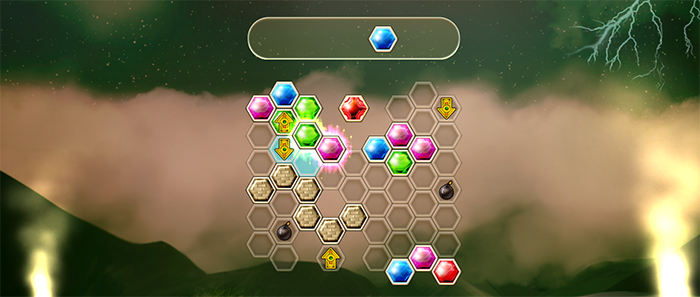
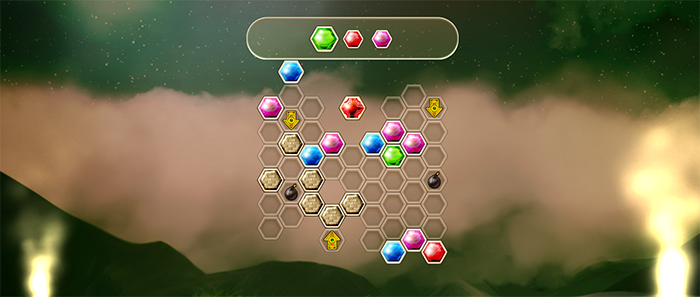
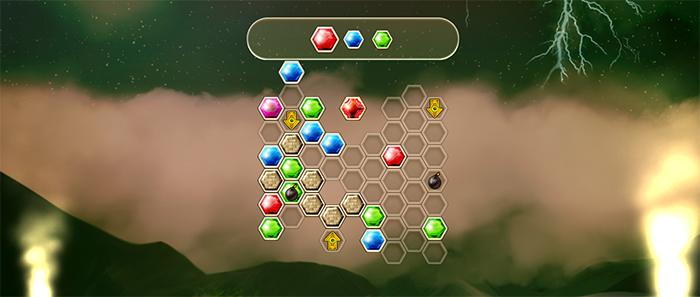
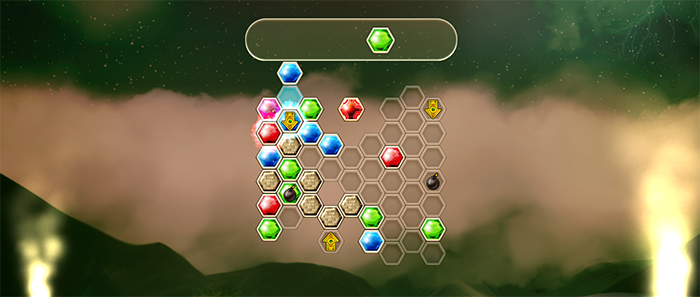
1- First activate the top arrow (the one going upwards.) It’s essential not to activate the arrow going down (yet.)

2- Then play your scales in order to occupy the cells around the bomb strategically. We aim to activate the arrow going down and, in doing so, yield a combination to explode the bomb. In our example, notice that the two green scales (one of them having the bomb) will combine with the lone green scale we’ve placed at the bottom left. When the arrow is activated, a combination will be formed immediately, exploding the bomb.

3- That’s it for the hardest moves. Now it only remains to activate the other arrow to descend the bomb.

4- Explode the bomb.

5- Finally, activate the arrow and conquer the top red cross-scale.

Good luck!

23 Feb

DragonScales 3: Beating monsters and removing symbols

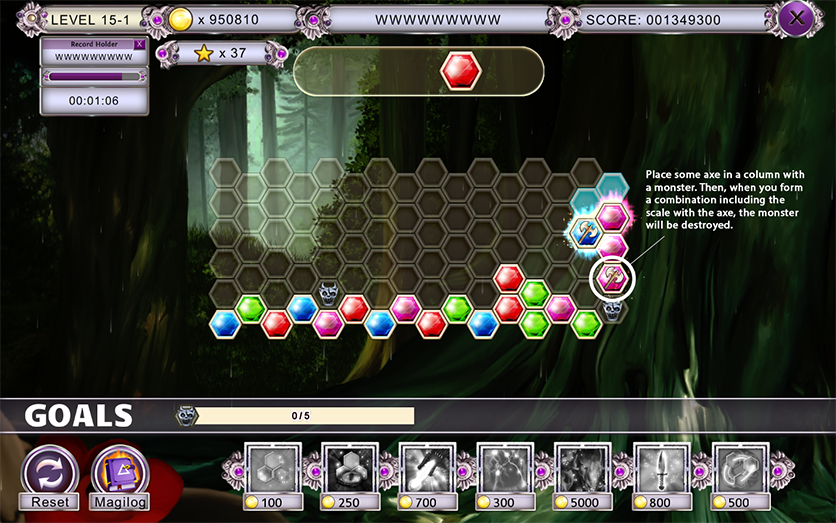
In DragonScales 3 you’ll have to destroy some special monsters by using the Sacred Axe. Specifically, all the levels of World 15 are full of such pesky creatures. Destroying them is easy, though. Pay attention to the scales you receive to play. Some of such scales will contain a little axe. Try to place the scale with the little axe in a cell of a column containing a monster. Then continue playing to form a combination which includes the scale with the axe. When such combination is formed, the Sacred Axe will appear to smash the monster (see Figure 1.)

Figure 1

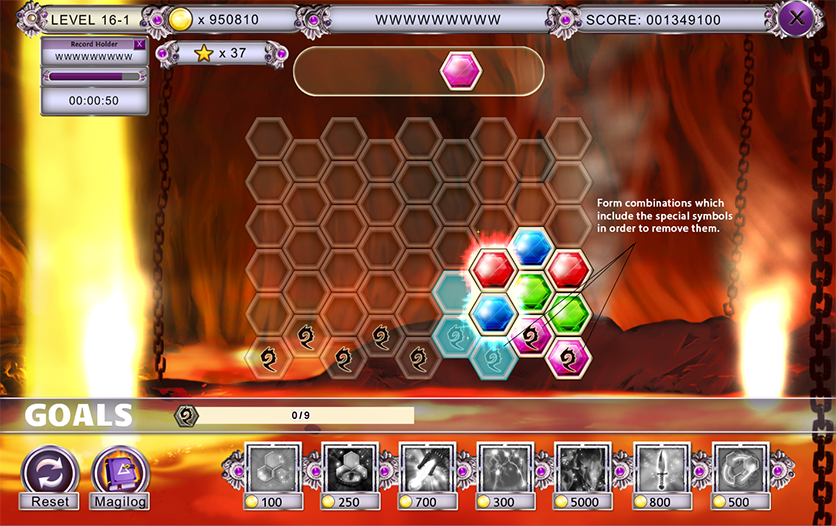
Further on, in Level 16, you’ll find the traditional DragonScales symbols on the board. To remove them simply form combinations on the cells with the symbols (see Figure 2.)

Figure 2

Remember we’re available to help. You can reach us via our Facebook page or our Twitter account (@superikigames).

30 Dec

After playing the NagiQ demo…

Hello again! If you’ve followed the tutorial to learn how to play NagiQ, and then played the demo (freely available here,) most likely you already finished all the free levels included with such demo version. Now, by purchasing the full version of NagiQ you’ll get access to all the islands of the game:

screenshot_4

All of NagiQ’s islands can be unlocked in the full version of the game.
In the full version of the game each island will be immediately unlocked after you complete the previous one. Then you’ll be able to click on an island image to select a level to play. Notice that some levels introduce gameplay variants to keep the game fresh, fun and challenging!

Enjoy! And Happy New Year!

16 Dec

How to play NagiQ

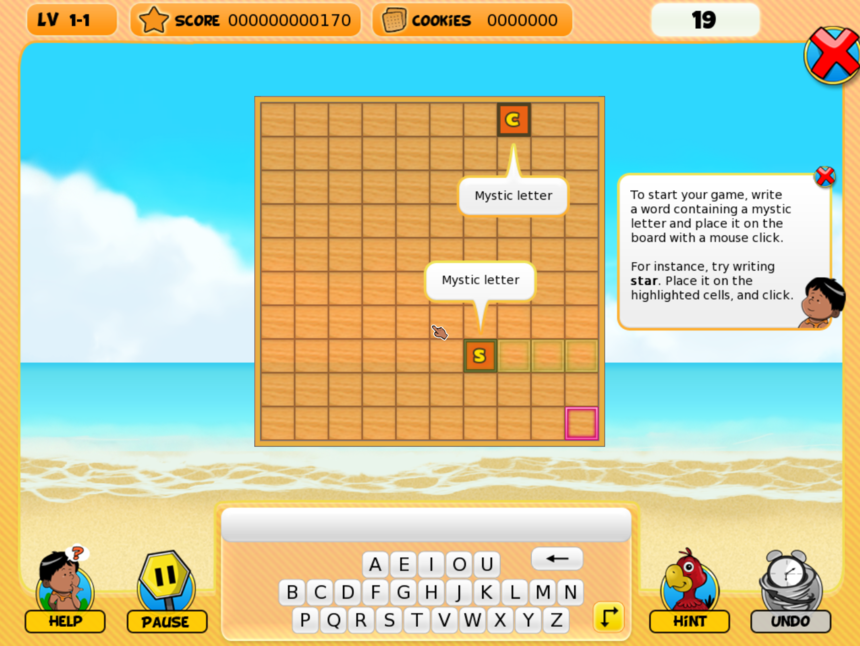
This is a little tutorial explaining how to play our first game, the challenging word game NagiQ. Things will be easier if we start with a screenshot of the first level:

NagiQ-start

First level of NagiQ

Notice there’s a board, with some letters on it. Letter S and letter C. We refer to those starting letters as Mystic Letters.

How to play?

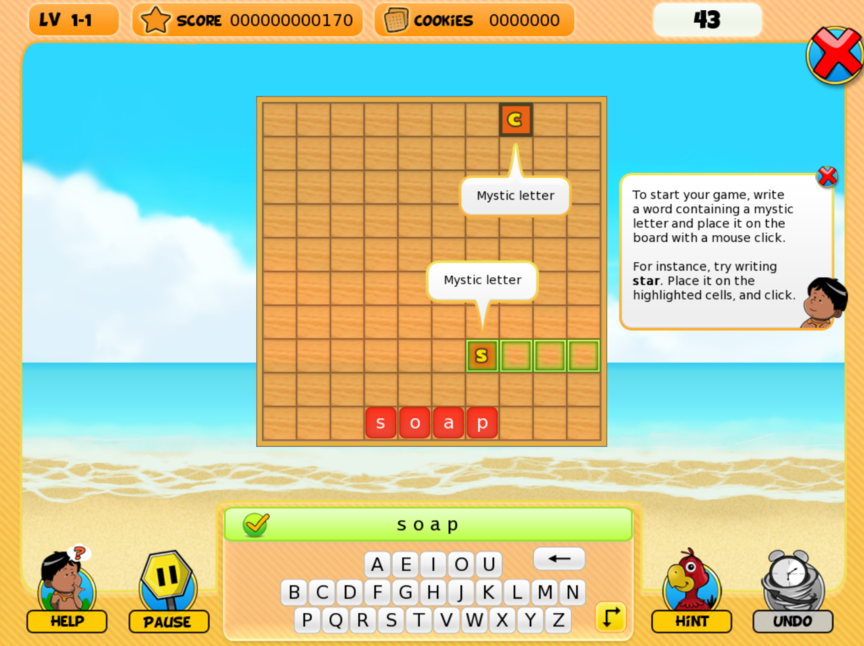
The rules are simple. Form a word (by typing it with your keyboard, or by clicking on the letters of the game’s permanent on-screen keyboard) and place it on the board with your mouse. For instance, type the word ‘star’ or ‘soap’… whatever. When you’re typing the word, the game will show a green verification mark to let you know that it will accept the word you’ve just typed.

NagiQ-soap

I’ve just typed the word ‘soap’. The green verification mark shows the word is accepted by the game.

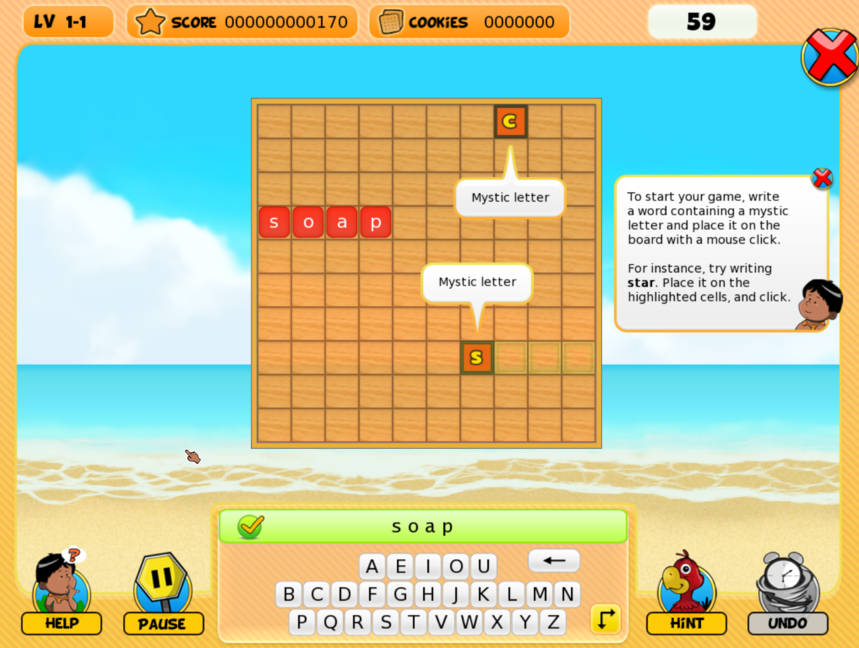
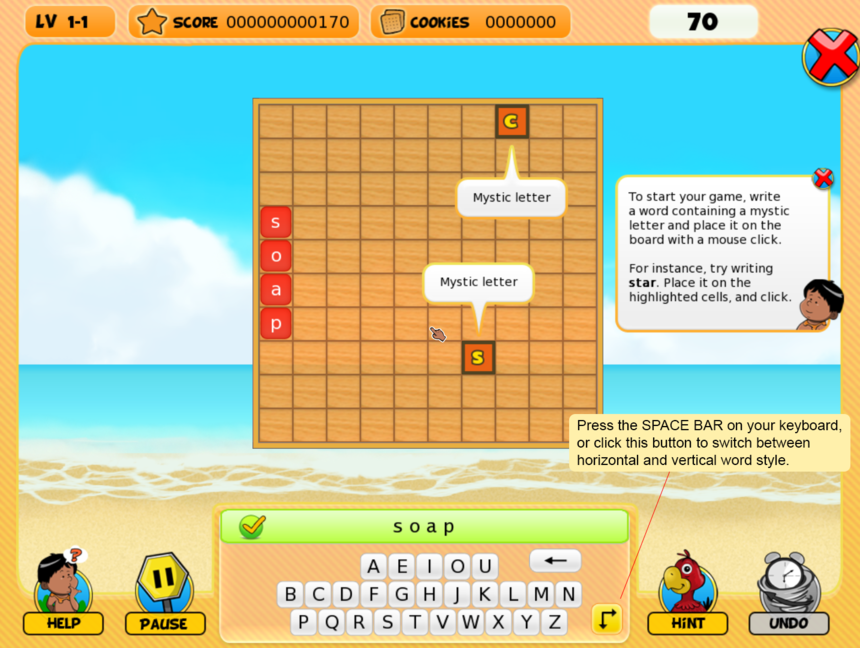
OK, that’s it for forming words. Now you have to place such word on the board. And the word might be placed horizontally or vertically. Press the SPACE BAR on your keyboard to switch between horizontal and vertical style (alternatively, the on-screen keyboard has a special key for this task, if you prefer to use the mouse.)

NagiQ-horizontal

Horizontal style.

NagiQ-vertical-explanation

Vertical style.

Now that the word orientation is chosen, it’s time to place the word on the board. To do so, simply click on a board’s cell. However, there’s a very important rule:

Every new word you want to place on the board must include at least one of the letters ALREADY PLACED on the board.

That’s why our first word can be ‘star’ or ‘soap’, because such words include ‘s’, and our board already has a letter S. We could also start by forming the word ‘car’, because the board also has a letter C. We could also form the word ‘base’, because ‘base’ has an ‘s’. Or the word ‘case’, which has both ‘c’ and ‘s’. Whatever word you form, the important thing to remember is that such word must contain a letter already on the board.

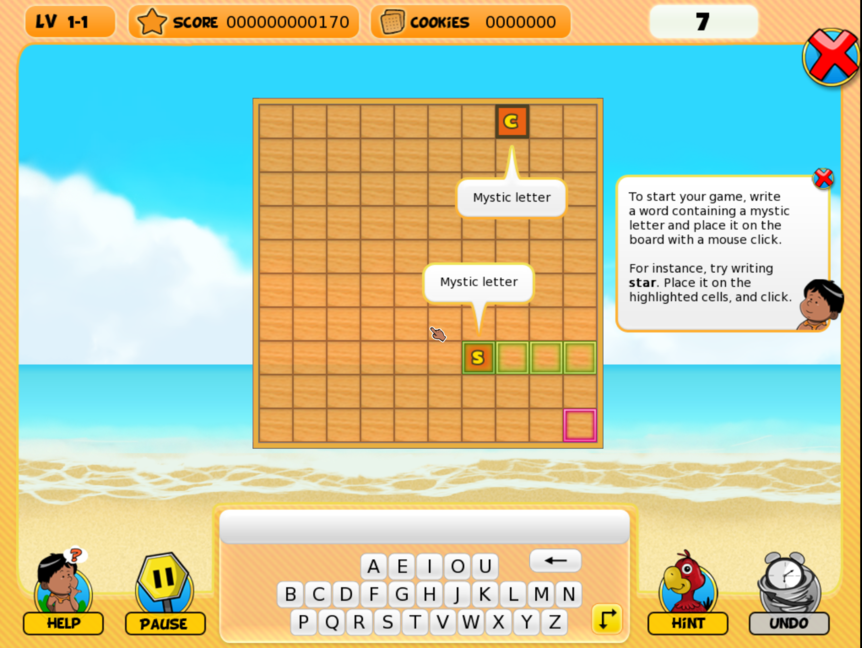
Use your mouse to move your word around the board, and click to place it. You cannot place your word anywhere, though. You have to connect it to a letter already on the board. Simply move your word and ensure that a letter of your word overlaps a matching letter already on the board, e.g, if your word is ‘star’, ensure that the ‘s’ of ‘star’ overlaps the letter ‘S’ already on the board. When the word is well placed, the game will change the cells’ color to green. Then click to finally place your word on the board (Pro tip: you can press ENTER on your keyboard instead of a mouse click.)

And that’s all. Do you remember those Mystic Letters, S and C? Well, in order to win the level you’ll have to place your words properly, to ‘connect’ with ALL the Mystic Letters on the board.

Upcoming boards contain cookies to get hints, and each island of the game offers gameplay variants. But essentially, these are the core rules of NagiQ. Two little details:

  1. You cannot connect your new words directly to the Mystic Letters, except for the first word you place on a board. In other words, your first word might connect with any of the Mystic Letters S or C. But after you’ve placed your word, you next words must include letters of the words you’ve placed.
  2. Once you use a word, you cannot re-use it on the same board.

Let’s see a commented game to better understand the rules.

NagiQ-1

First level of NagiQ. Two Mystic Letters: ‘S’ and ‘C’.

NagiQ-2

We type a new word: ‘cases’. The green verification mark shows it’s a word accepted by the game.

NagiQ-3

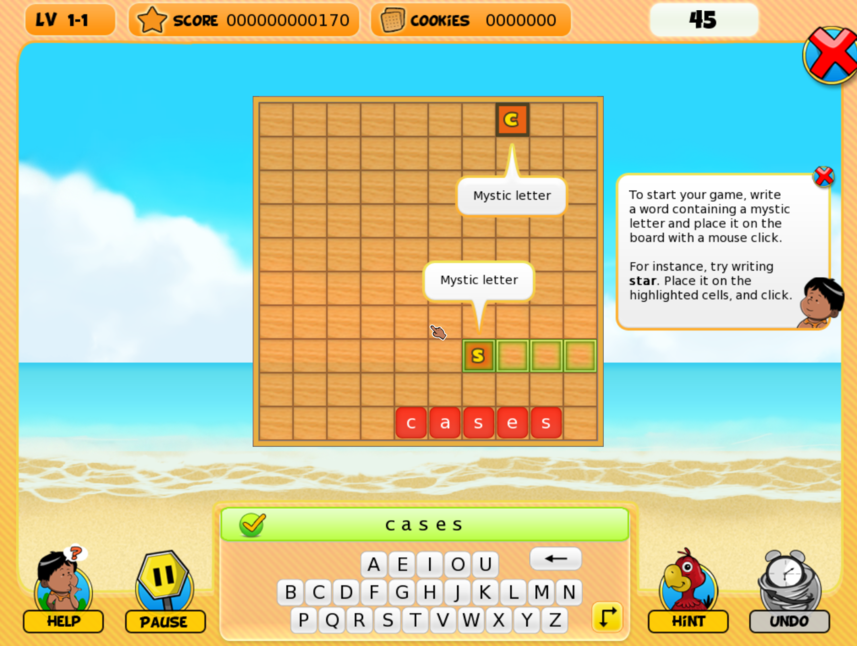
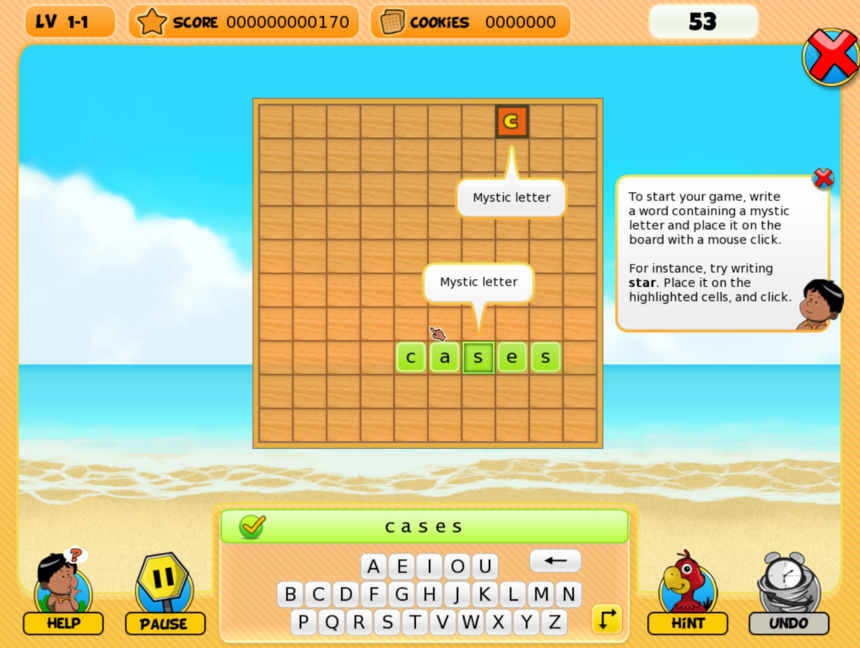
By using the mouse we place our word ‘cases’ so that one ‘s’ of ‘cases’ overlaps the ‘S’ already on the board. If the placement of a word is OK, the tiles’ color changes from red to green.

NagiQ-4

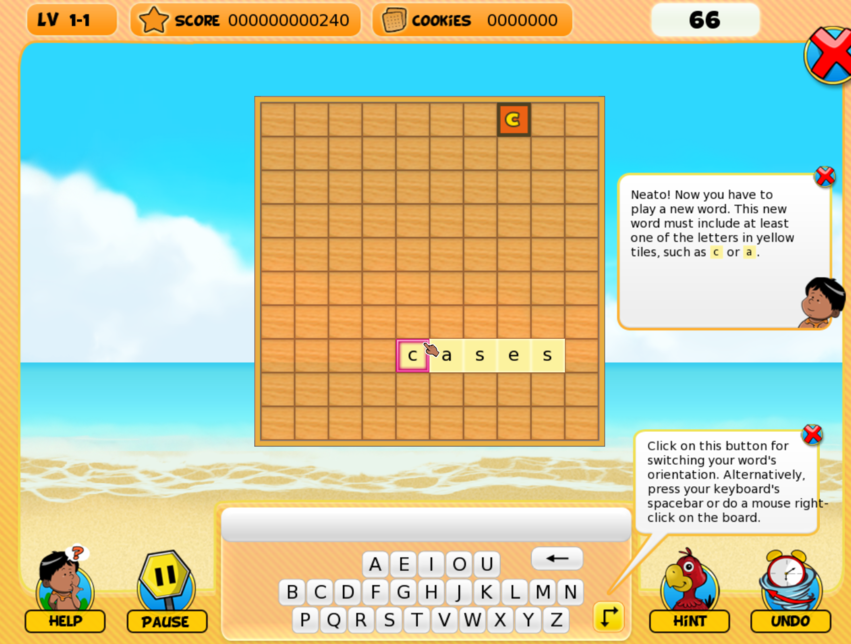
Click or press ENTER to finally place the word ‘cases’ on the board. The color of the tiles changes to yellow after the word is placed on the board.

NagiQ-5

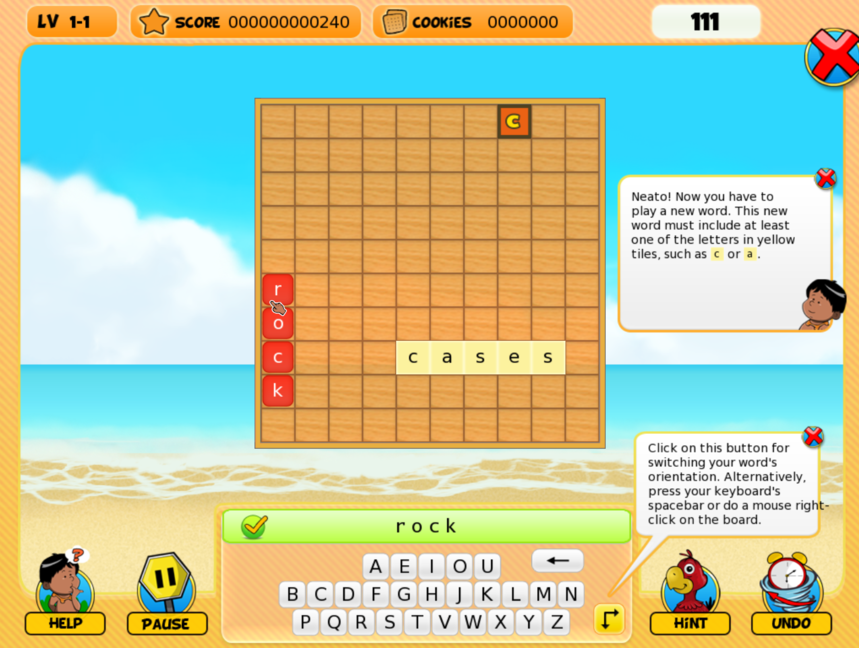
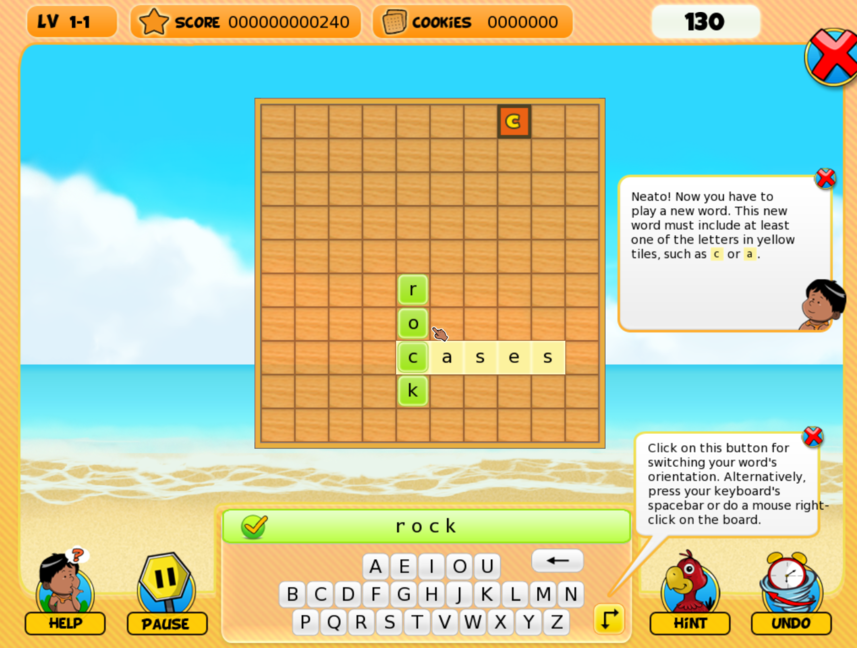
We form a new word: ‘rock’.

NagiQ-6

We want to place it vertically, so we press the SPACE BAR on the keyboard. We can achieve the same effect by clicking the special yellow button on the on-screen keyboard of the game.
NagiQ-7

We move our word and place it to match and overlap the letter ‘c’ of the word ‘cases’ we’ve just placed on the board.

NagiQ-8

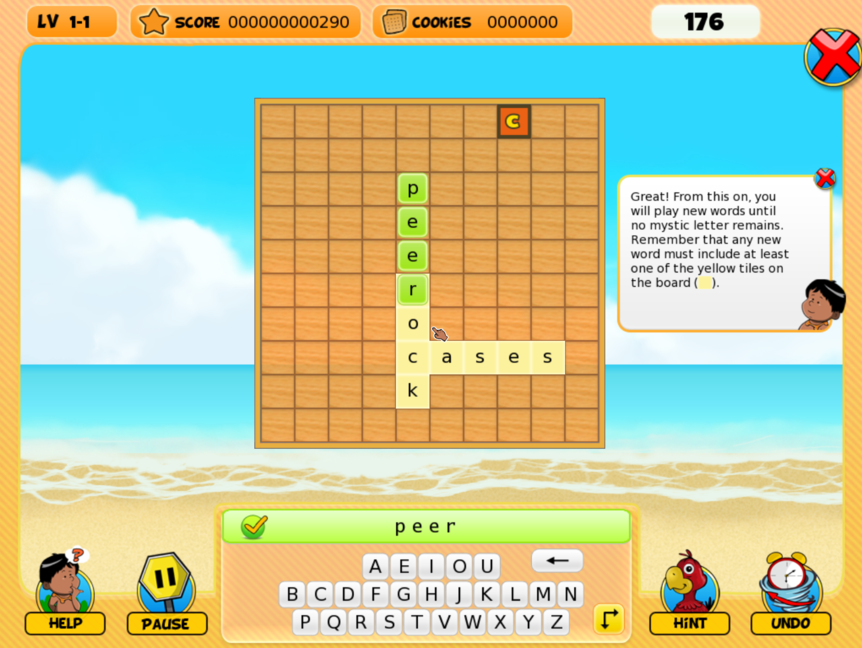
A new word: ‘peer’. We place it to match and overlap the ‘r’ of ‘rock’.

NagiQ-9

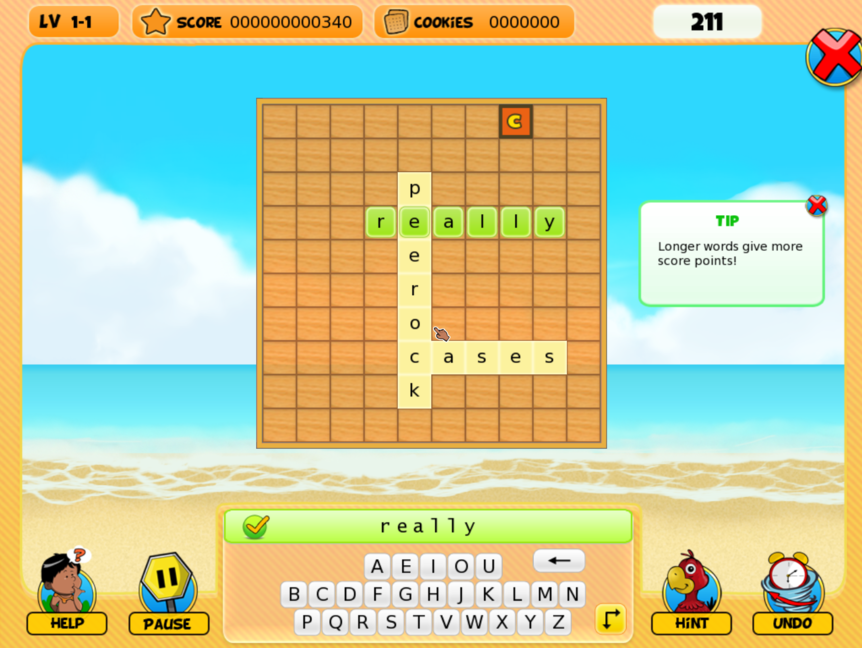
Now we typed ‘really’. We switch it to horizontal style, and place it to match and overlap the first ‘e’ of ‘peer’.

NagiQ-10

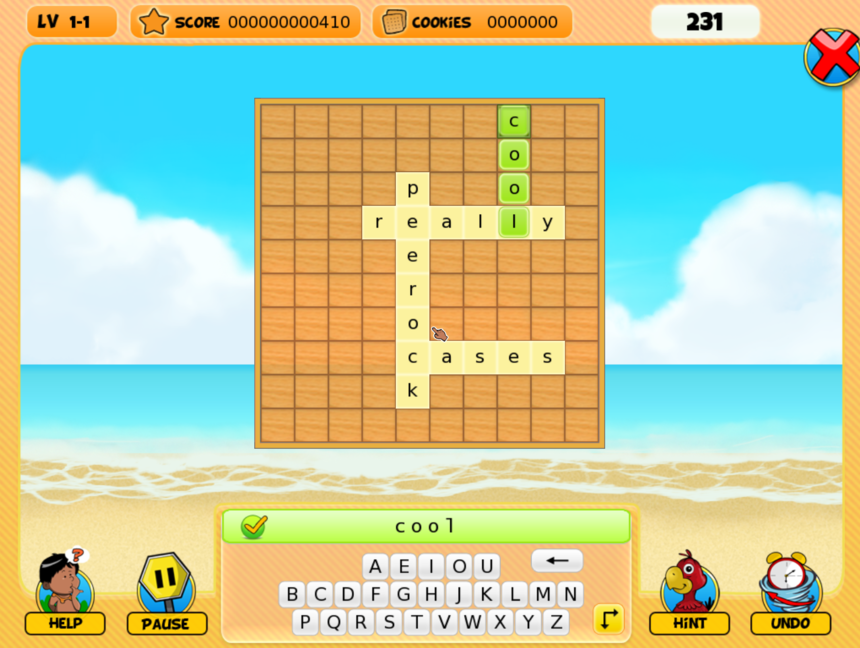
Finally, we type ‘cool’. We place it to match and overlap the second ‘l’ of ‘really’. A smart move, indeed: this word ‘cool’ allows us to also match and overlap the remaining, unconnected Mystic Letter C. Therefore, after playing ‘cool’ (pun intended) we will connect with Mystic Letter C, and there won’t be any unconnected Mystic Letter on the board. That way the board will be completed.

NagiQ-11

Well done. After placing ‘cool’, this level is completed.

Combinations are endless. Have fun 🙂