Our friend and guru Match 3 player Kathy Lew (SynthpopAddict) wrote this guide for our game Nocturnarya. Enjoy!
General tips
The Menu section in the top right of the level is the go-to spot for all sorts of customization options. The popup window which appears has numerous sections for you to configure the game pretty much any way you’d like and you can change anything at any time. Wish all games were this great about being able to tweak things to your liking! Not only can you change the usual stuff like windowed/fullscreen, choosing a custom cursor if you want one, and the game mode (relaxed, limited moves, timed) but you can adjust the difficulty of the game and display effects in subtle ways. Play around with the Menu options until you get the game suited to your liking.
The Help section is where all the game help texts are kept if you missed a popup somewhere. You can preview all the game’s features by going to the Help book even if you haven’t reached a level with that item yet.
Levels
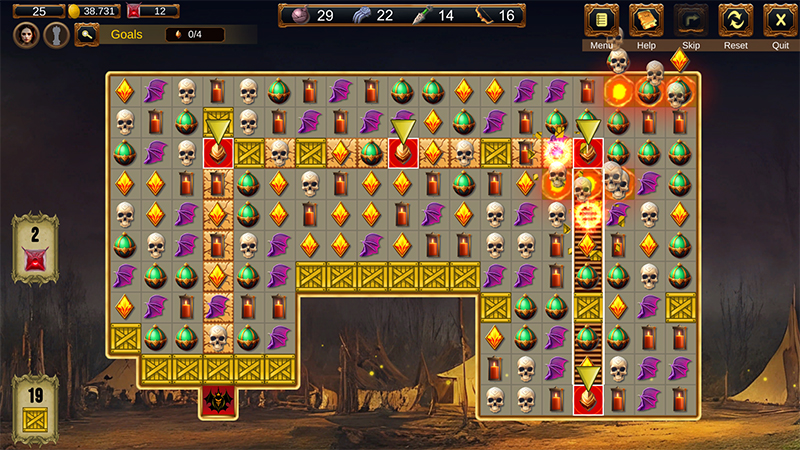
–Vampire crest levels: remove the beige sand-like squares and move/destroy obstacles otherwise in the pathway between the vampire crest and gold nuggets so the vampire crest can reach all the gold nuggets. In later levels, Flaming Head obstacles appear which you have to toggle a lever on the board to disable the Flaming Head(s) so the vampire crest can keep moving. Note that Flaming Heads will regenerate the sand-like squares in their pathway when they are spouting their flames. Because of this, you can’t clear every sand square in a Flaming Head level. In other levels, you may not have to clear every sand square either…as long as the vampire crest can reach all the gold nuggets, it’s OK.
–Grass tiles: remove all the green, brown (double match) and blue (triple match) squares.
–Battle: deplete all of the boss’ hit points before they take all of your hit points. Matching over the colored squares in battle levels is a key strategy as that replenishes your hit points and allows you to do strong attacks which is the main way to deplete the boss’ hit points. There is a one-time use “Drain Blood” which takes anywhere from 10-25% of the boss’ hit points if you click the button. After playing for just a little while, you will get a helper who throws bombs at the boss when you match over the blue squares in battle levels. If you want to play in “hardcore” mode, you can go to the game options in the Menu section and disable damaging the boss with simple matches so that the only way to hurt the boss is to use the colored squares in battle levels. Otherwise, making any matches in a battle level does some damage to the boss depending on the size of the match.
–Minigames: Just play them! Most of these are super easy and you get tons of nearly free gold for playing them, which you really need for building your village and upping your helper’s skills. In the CE version, the CE minigames unlock pretty rapidly, so if you really want to get rich quick, take a break from the SE M3 levels and play all the CE minigames.
Village Building
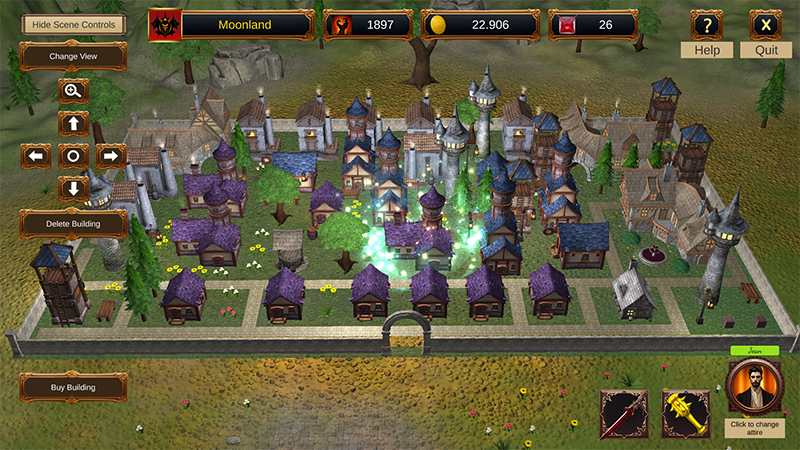
Not only is this infinitely customizable – you can build and redesign anything in the village so long as you have the gold to do so – but building the village is crucial to being able to win battles. The more you build up your village, the more your hit points, attack strength, and healing abilities increase. You even get to name your village whatever you’d like! If you have the CE version, some buildings have a diamond in the thumbnail image, indicating these buildings are only in the CE. Once you’ve gotten your helper companion, you will also have the option to buy different outfits for your helper in the village, which will either increase your hit points, healing ability, or the amount of gold amassed in M3 levels. After playing about halfway through, you will get the Fang sword, which can be upgraded for a hefty sum. Although it’s expensive, you definitely want the True Fang version for the last few battles.
There are a lot of options for viewing the village along with scroll and zoom features. Items can be rotated by right-clicking before you set them down into the scene, and can be repositioned by using the right mouse button to drag them elsewhere. If you want to remove a building, wait until you’ve won 5 gold cups so the Golden Mace unlocks. The Golden Mace lets you delete a building and get your gold refunded; otherwise deleting a building won’t give you back your money.
Several buildings in the village are locked until you’ve found enough of the hidden Blood Cartridges in the M3 levels.
While the default views of the village look small and simple, zooming in lets you appreciate the true details, so have fun!
I suggest using your gold in early levels to build things in the village so you can get some boosts to your battle skills. Otherwise, winning the first 1-2 battles will take some serious luck. The 90% gold increase with your helper is actually not all that useful except for very early on in the game. If you want to change your helper’s ability in a battle level, just click the Menu button to go to the village and then you can change the helper’s outfit.
Locations of blood cartridges
This is a pretty close estimate (should be within 1 space) of the locations of all the blood cartridges. Although the game says you have to match next to a cartridge to pick it up, you can match the tile hiding the cartridge and it works too, so just make moves somewhere in the vicinity. Once a blood cartridge has been found, it will not reappear in level replays.
Level 15: The game tells you where this one is by pointing to it (3rd space down of the 7th column from right).
Level 16: 4th space from bottom of the 6th column from left and 4th space from top of 6th column from right.
Level 17: 4th space from bottom of far right column and 6th space from right of the top row.
Level 18: 3rd space from bottom of 8th column from right.
Level 19: bottom spot of the 8th column from left and 3rd space from bottom of the 3rd column from right.
Level 21: 5th space from top of 9th column from right, and 9th space from right of bottom row.
Level 22: 2nd space from bottom of 7th column from right.
Level 23: 6th spot from right of the top row.
Level 25: 2nd spot from bottom of the far right column and 2nd space from bottom of the 8th column from the left.
Level 26: 6th space from right of the top row.
Level 27: 5th space from top of the far right column.
Level 28: top space of far right column.
Level 31: top row, underneath the wood box.
Level 34: bottom right corner and 2nd spot from bottom of the far left column.
Level 36: 5th space from right of the bottom row.
Level 38: top right corner.
Level 41: bottom left corner.
Level 43: top left corner.
Level 45: 5th space from left of the 2nd row from the bottom.
Level 47: 9th space from left of the top row.
Level 51: 5th space from left of the top row.
Level 53: 5th space from top of the middle column (count 10 in from either side – it’s the column with 2 wood boxes at the top).
Level 59: top left corner and 5th space from right of the 2nd row from bottom.
Level 64: top left corner and bottom space of far right column.
Level 67: 4th space from the top of the 4th column from the right.
Level 71: 8th space from the right of the top row.
Level 77: top left corner.