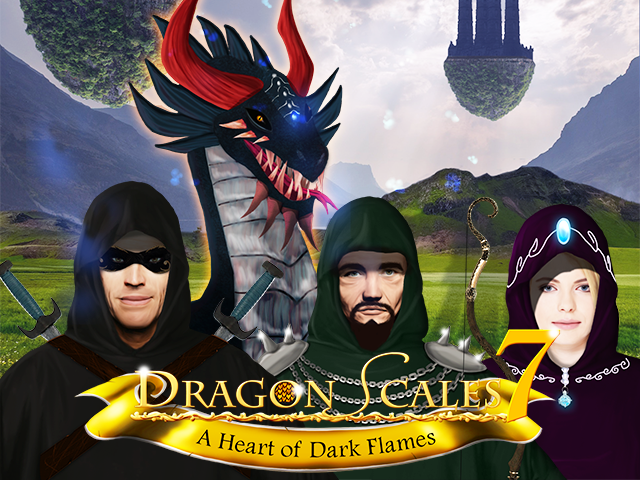
This is a complete walkthrough for our game DragonScales 7: A Heart of Dark Flames, written by our friend and guru Match 3 player Kathy Lew (SynthpopAddict). The original version of this guide can be found on the PondFriends forums.
For those who don’t want the entire game spoiled, I will put general tips for playing in the first few posts and begin the walkthrough further down. Enjoy!
There are no hidden stars in this DragonScales; every board with a star will have it obviously showing.
Tip on arrows: I repeat this several times in the walkthrough section for the tricky boards, but this is so useful I’m also putting it up here. It took me a very long time playing all the DragonScales games before I realized that the arrows in boards point to the “trick” spots to put specific colors onto in boards where there are isolated scales to match up only through cascades from tripping arrows! In a nutshell, if there’s some “unreachable” area you have to match in and there are arrows, put the matching color scale onto the spot furthest away from the arrow in the same column that arrow is in. Then when you trip the arrow, the matching color will move towards the color in the “unreachable” area. Every once in a while you may have to place 2 scales in that column depending on the board’s shape to get the cascade match with arrows to work, but you should get the idea – knowing this trick makes several of the “hard” boards of the series much less frustrating!
A lot of this game has upwards gravity. Yep, you’re “standing on your head” most of the time here; no idea why! Check the top left corner of the game screen to see which way the arrowhead is pointing. If there’s a minus sign instead, it’s a board with no gravity.
The text at the top left corner of the game screen is as follows:
-Stage/board number and gravity indicator
-Score
-Percent of game completed
-Total amount of gold coins available
-Total number of stars collected in game
-Number of keys you currently have
This game features 3 categories of items to use and upgrade: arts (aka powerups), spells, and battle skills.
All arts can have their recharge rate upgraded as you go along. However, I have found it’s not necessary to upgrade the arts manually. Everything auto-upgrades gradually anyway as you go along, and I’ve found it’s possible to play the vast majority of the game without using the arts.
Art types: You have only 2 at the bottom left corner. Blade on the far left looks more like a wand to me, and removes 1 regular scale from the board of your choosing. Ultimate Prescience is the 3 tiles with an eye thingy which allows you to custom select your next set of scales. I personally did not ever have to use the Prescience powerup but Blade does come in handy once in a blue moon. Making matches over a period of time recharges a used art.
The game is much more battle heavy than earlier releases were, and the enemy lineups early on can be surprisingly challenging. Many battle boards feature elements of traditional DragonScales boards, so it’s not just killing off the enemies, but you’ll have to work your way through clearing assorted obstacles or getting special scales now too. Paradoxically, battle boards can become significantly easier the farther you go along (more later).
All your battle skills auto-upgrade periodically as you “level up” by playing battle boards for battle experience. But you will also get opportunities to manually upgrade your battle skills if you get the star from boards featuring a star. I chose to upgrade my hit points first, as you don’t have many to begin with and the enemies are surprisingly tricky early on. After that, upgrade your basic attack strength. The other things can be upgraded at your discretion depending on if you’d rather be luckier with getting a double strength (critical) attack more often, or you want the 400 hit point lightning spell used trophy, or the chance to get more killing spells. I did not have to manually upgrade any of my battle skills more than 2 or maybe 3 times except for the lightning spell strength as I was going for that trophy LOL. Once the hit points reach to about 275 or 300 and your basic scales attack strength gets past 20 you really don’t have to manually upgrade those anymore as the auto-upgrading will be enough to keep up. Late in the game when you get the chance to manually upgrade something, you can pretty much randomly pick whatever you’d like.
Your battle skills are as follows. Note that the game dialog includes the arts at the end of the battle skills list, even though the arts are not only for battles.
-Hit points (HP): the amount of damage your character can sustain in battles
-Power basic scales attack: the amount of damage you inflict on the enemy by making matches. It doesn’t translate exactly as 15, 20 or whatever hit points as a M3 is something more like 75 or 100 hit points even very early on; looks to be more a rating for attack strength as it’s somewhere between 10-30.
-Power lightning attack: exact number of hit points removed from the enemy when using the lightning spell
-Luck for killing spells: the chance you’ll have of getting a “kill 1 enemy” spell from the question mark spots in battles; like the power basic scales attack number, this is a rating
-Luck for critical attack: the chance of you getting to inflict extra damage with a match; this is a rating
-Art filling speed Blade: rates the speed the Blade powerup recharges with matches
-Art filling speed Prescience: rates the speed the Ultimate Prescience powerup recharges with matches
Spells: These except for the feathered skull and red liquid test tube, can be used only in battle boards. Except for the lightning spell tutorial board very early on, spells are awarded in battle levels by making a match next to a question mark spot, which will then award you a spell of the game’s choosing. If you run out of spells and need more, you can click on the Store button at the bottom right and trade some gold coins to buy whatever unlocked spells you want. It was my experience though that you should much rather use your gold for building the village instead, as building the village helps you more in battles over the long run, so try to avoid using the shop if possible in the first half of the game.
Question mark spots in the boards are either blue or yellow. The developer has told me the yellow question marks typically have better spells and/or be introduction spots for newly unlocked spells as you’re going along, but any of these spaces are useful, particularly later in the game, so even if you don’t need the spells immediately, never hurts to stockpile free spells!
The spells in the tray on the bottom from left to right are as follows. To use a spell, you first have to drag the spell icon onto one of the scales you’re about to play and then match that scale.
-Lightning: super attacks one unshielded enemy
-Multi-lightning: super attacks all unshielded enemies
-Spiked mace: may or may not randomly kill one unshielded enemy who doesn’t have a mystic ring; it sounds great, but it’s actually pretty useless since it consistently kills only the very weakest enemies (either the ones who get summoned by the vampire warrior guy or else the very weak enemies in the early part of the game)
-Clawed hand: kills the enemy in the lineup with the least hit points who isn’t wearing a mystic ring. This spell works kind of strangely. If you’ve only got 1 enemy left in the lineup or it’s the only enemy in the board, the clawed hand spell will affect that 1 enemy. But if there’s more than 1 enemy in the lineup, triggering the clawed hand spell affects not the guy you’re targeting – it’s the match you made over the spell that will hit that guy – and the clawed hand spell will hit whatever other enemy in the lineup has the lowest hit points! Yes, it’s confusing…
-Garden trowel: reduces the hit points of all unshielded enemies by 25%; mystic ring wearers will resist this spell
-Apple: restores 30 of your hit points
-Turnip: restores 2 of your hit points for every scale you have placed on the board (obviously this works better when your board is pretty full)
-Red potion: gives you back all your lost hit points (best to use when you’re about to die)
-Dragon shield: protects you from up to 3 direct hits (doesn’t do anything for attacks like removing scales from board, adding scales to board, or adding green potions to board)
-Hourglass: makes the number on the enemy attack countdown a little higher. Do not use this spell if the countdown is already at the maximum or it just reset recently as you will not ever get more than the maximum turns allowed on the countdown for that board. This spell is best to use when the countdown is near zero and you need just a couple more turns to get a good setup made.
-Feathered skull: removes all regular scales on board (will not remove patterned scales, runes or any special spaces on boards or items to collect)
-Red liquid in test tube: instantly charges all your arts
-Gold fist: doubles your attack strength on the next 3 matches you make
-Chain: randomly stops one enemy from doing any type of attack when their turn comes up next. Note: do NOT use the chain spell again if the enemy has not lit back up from using the chain spell earlier. If you use a chain spell too soon, the 2nd spell gets wasted! Wait until the enemy has actually reactivated before chaining them again if you want to silence them some more. Chain spells aren’t needed until you get to the really tough battles with just one enemy who has a lot of hit points and many special attacks in my experience.
Battle tips
The number at the top right of battle screens is the enemy attack countdown. When it goes to zero, the enemies will attack somehow. If you have a chain spell on an enemy, when the countdown reaches zero, the game will make the “attack” noise for an enemy attack, but that one enemy will not actually attack you; only the other guys on the board will attack. If there is only 1 enemy and you have it chained, the “attack” noise will sound but nothing else will happen.
Try to make larger or multiple matches if possible as those inflict more damage than just a single M3. Many battle boards feature hammers to clear. This needs to be done ASAP as getting all the hammers off the board will unshield the enemies. As long as an enemy has a shield, they are invincible to any type of attack. Each hammer removes 1 shield from a random shielded enemy so you have to get all the hammers in order to win. Enemies will try to directly hit you removing some of your hit points, or may do other attacks like adding scales to the board, removing scales from the board or special attacks. If the board is around half or more full, the enemies will sometimes give you a break and not attack you when it’s their turn, probably because they were planning to add scales to the board in that attack.
Some enemies have a tiny blue ring at the top of their hit point meter – it’s extremely difficult to spot – this is a mystic ring which allows that enemy to block any killing spell (spiked mace or clawed hand).
The killing spells really only work on the lower level enemies such as the ones who get summoned as backups. The stronger ones are pretty much immune to killing spells, so it’s not worth trading your gold late in the game for these spells.
You can select which enemy in a lineup you wish to attack with your next match or spell by clicking on them, which is important when you have some shielded enemies and some unshielded, or you want to focus on a particular one due to their attack ability.
Some enemies have colored eyes which means they can only be hit by matches of that color. You do not have to select these enemies if a match of their eye color is made; it will automatically hit them.
Some of the special abilities of the enemies are as follows. This isn’t an inclusive list as some enemies late in the game have multiple abilities.
-Hooded mages: Can give themselves or 1 random other enemy in the lineup (brown mages) or everyone in their lineup (blue mages) back hit points
-Stone Yoda: drops stones randomly into the board
-Stone girl: changes your next scale set into stones
-Purple alien: changes your next scale set into unmatchable black tiles (will vanish after 5 more moves)
-Vampire warrior: calls for backup enemies to help
-Masked female warrior: clears all scales from the board
-Gold helmet guy: turns some board spaces into the spots you can’t place anything directly upon
-Wolf character (it’s got braids or awesome dreadlocks too?): adds green potion bottles to the board which you must avoid matching over; matching green potion bottles gives hit points back to the enemy
-Robot eyeball: throws a bomb onto board which will explode after 5 moves if you don’t make a match over the bomb, explosions remove some of your hit points
-Snow lady in white: throws multiple bombs on the board
Once you have gotten all hammers off a battle board, try to focus your attacks on whomever has the strongest special attack ability first or has a mystic ring, then work on whomever is able to directly attack you the most before working on the guys like the stone enemies, who usually won’t even bother to directly attack you. Try to get your matches set up not just for having multiple or later matches, but make them around the question mark spots so you can get the spells available. Getting the stars or coin bags on battle boards is optional, but each star is worth 1 manual upgrade to your battle skills.
Later in the game, battles will start having locks and keys. Getting a key allows you to click on 1 lock to remove it. You must remove all locks from a board because they will be blocking off hammers.
Some battles have hammers with little arrows on them (gravity based hammers). These hammers won’t let you place any scales on top of them to match out like the regular hammers. The trick is to clear out whatever blocking scales are in their way so they fall off the board.
Village Rebuilding
As mentioned earlier, the battles can get easier over time. The secret to this is to hoard all your gold coins as much as you can for restoring the demolished village and buy parts in the village at every opportunity. This along with the auto- and manual battle skill upgrades you get will eventually make most battles not that much a hassle. Buying buildings in the village scene gives you rank points and you will get an extra turn in battles for every 100 rank points you gain in the village building scene. You get extra gold coins for playing the assorted jigsaw puzzles, memory card games, bonus puzzle boards (the “X” levels), and the pick-an-icon slot machine sort of game, so it’s worth it to try to do those to get gold coins faster. You also get some gold for playing any regular board or battle level. Although getting 1-3 extra turns in battles doesn’t sound like much, it really does make a difference the further you go along and will keep you from having to buy as many spells late in the game as you can end up with as many as 11 turns before the enemy even gets a chance to attack. The village can be accessed at the end of a board in the end board dialog box by clicking on the village button or by going to the levels map and clicking on the village button there. The village button in the end board dialog will sparkle when you’ve got enough gold to buy a part.
Replaying levels: To get to the board selection screen, click the X on any board to exit from it, which will get you to the level selection screen. Here you can also check if you got all the stars from a level and what’s left in the game overall. Green is previously done, and if the star above the main level circle is lit, you got all the stars too. Unlit stars are yet to be obtained. Yellow is the highest board you’ve reached in the game and a yellow level circle is a level in progress. Red is a currently locked level/boards.
Walkthrough
The minigame locations were moved around in between different beta versions and the final release version. Hopefully I got them all in the right places, but if I didn’t, feel free to let me know.
1-1: Gravity is upwards. Follow the tutorial, then clear out the rest of the patterned scales.
1-2: Gravity is upwards. Match around the rocks to clear them out so you can get to the patterned scales. A clever strategy is to drop the scales into spots a bit further away so the scale set will break with gravity; “useful” colors will then fly into the spots next to the patterned scales and you can prevent things from getting as blocked off while trying to clear the rocks.
1-3: Gravity is upwards. Use same strategy as in 1-2, but work on the patterned scales on the bottom right first.
1-4: First battle level; gravity is upwards. As the popup says, try to make double matches or bigger matches (M4 or M5) to get done faster. This one’s an easy board to get the “kill 1 enemy with a single attack” trophy if you get a double or triple match set up. (The trophy in question will only be awarded for an actual scales attack, not for using a spell, BTW.)
1-5: Gravity is upwards. Try to match out some of the pairs in the top middle simultaneously to get more damage. Otherwise, it’s not too tough even though this is the first battle where the enemies can directly attack you removing hit points.
1-6: Gravity is upwards. This is a spell tutorial level, so instead of the question mark spots which all later battles have, there are 3 lightning spells lying on the board. Match over all of those to get the lightning spells which will automatically go off to make this one really easy.
Jigsaw puzzles: The first of these minigames appears between 1-6 and 1-7. It took me quite a while to figure this out, but if you look carefully at the borders of each square you can get an idea of what’s supposed to go there and swap the 4 pieces into that section accordingly. When you have the pieces rotated properly, they will exactly match the background image/border, so if the pieces have some kind of weird overlapping effect, you either need to rotate them or move them around within that square until they look like they’ve “disappeared”. A finished square will be highlighted. The Hint button will display the image of 1 solved square. The Skip button is that X at the top right, but it’s very worth it to solve the jigsaws, as you will get quite a lot of gold coins for helping you build the village scene and also to buy spells for battles should you need them.
1-7: Gravity is upwards. Match over all the runes (symbols on board) and clear all the patterned scales. An important tip to know is runes and patterned scales are immune to gravity so can be used strategically to block scales from falling into places.
1-8: Gravity is upwards. Scales must be passively moved into the blocked spaces for matches to clear the patterned scales. Work on the upper patterned scales first and strategically break scale sets with gravity.
1-9: Gravity is upwards. First battle level with spells mechanic of all future battles. In order to use any spells in battles from now on, you must first drag the spell you want to use onto a scale you’re about to play and then match that scale. About the dialog near the top with canceling your spell placement, that only works when the scale set hasn’t been placed into the board. If you’ve put the scale with the associated spell onto the playfield, it’s stuck there.
1-10: Gravity is upwards. Spells are now hidden under the question mark spots, as they will be for the rest of the game. Match next to a question mark to get the spell it hides.
1-11: Gravity is upwards. While you’re working on getting the spells from the question marks, don’t forget to trip the arrow so you can reach the star too. Stars and arrows are immune to gravity and will not let anything fall on top of them; scales must be directly placed onto them.
1-12: Gravity is upwards. I focused on killing the brown mage first instead of the vampire warrior since the mage can heal himself, then focused attacks on the vampire warrior. The vampire warrior is the first enemy to have a mystic ring blocking any killing spells, and he’ll block the “reduce HP spell” too. Don’t forget about the free spell at the bottom.
Memory card game: There is a bonus pot of coins which goes down by 100 coins every time you miss a match, so try not to do too much random clicking while surfing through the cards for your matches. If you can find some pairs quickly enough, these levels are worth a fair amount of gold from the pot coins.
2-1: Gravity is upwards. The road to success isn’t that hard if you’re paying attention to where the arrows point. It took me a long time playing all of the DragonScales series to figure this out, but the arrows actually tip you off to which column is the “trick” column to put things into in every board which looks hard to do! The “trick” spot(s) are the spaces aligned with the arrow which are farthest away from the arrow. So in this case, put a green scale into the top spot of the 2nd column from the right and another green scale next to it before tripping the bottom right arrow, and put a pink scale into the singleton spot on the left side before tripping the bottom left arrow to match those pesky patterned scales. You can take it from here.
The first opportunity to rebuild the village is presented here. It doesn’t matter what buildings you pick, but I usually buy whatever’s the most expensive since it takes longer to earn more gold. As stated earlier, buy buildings in the village at every opportunity you get to help you more in battles.
2-2: Gravity is upwards. Since the runes are immune to gravity, keep them in place while you work on the bottom patterned scales so things don’t go flying too far. Even the top 2 patterned scales benefit some from not having things flying in to block them off, so get the 2 top patterned scales next before finally working on the runes. If you don’t have the right scales for the patterned scales, put the scale sets onto the runes or match some of the runes where the flying scales don’t wall off the patterned ones.
2-3: Gravity is upwards. The arrow is pointing to the “trick” spot – put a green scale onto the space immediately underneath the hole. Put another green scale adjacent to the green patterned scale in the “island”. Trip the arrow after breaking through those rocks. Keep the runes in place while you’re working on the other patterned scales so things don’t go flying off too far. Once all the other items are gone, you can clear the runes.
2-4: No gravity. As long as you don’t fence yourself in, this one’s easy.
X games: These are optional puzzle levels where you have to clear all the scales using only the limited number of scale sets provided (1-3 moves). Tricky, but worth trying for the big stash of gold you’ll get for winning. They appear every so often as you’re going through the regular portion of the game. If you skip them, you can always try them later by going to the level map, but it’s worth it to play them as they pop up during the game to get the village built faster.
X-1: Gravity is downwards. Put red in the 3rd spot from the top of the 2nd column from the right, then the green atop the 2 reds, and the blue atop the green you just placed.
Walking a Pathway boards: You are the hooded character icon tile in the board and the goal is to move your icon into the crystalline portal by making matches over the directional arrows to “walk” a space in the direction the arrows point until the icon is on top of the crystalline portal. I missed this during beta testing, but be careful to not “walk” the icon off the playfield when it is on an edge of the board – the game will immediately close on you which isn’t a total deal breaker, but does make you have to reopen the game and restart the board in question.
2-5: No gravity. Pick any of the arrow spots to make matches over and keep matching over the arrows until the icon is on top of the crystalline portal. The tutorials for this level are now really good, so you shouldn’t have too much trouble. You don’t have to use just one set of arrows, so if the scales aren’t quite cooperating with you, put some of them onto another arrow and then use any or all of the arrows you’ve got scales around to match until you’re done.
Pick an Icon game: Super easy opportunity to get some free gold. I don’t bother with trying to get 2 or 3 of the same since the slot machine mechanic has the “reels” spinning so rapidly you can’t time them anyway. Just click on the 3 reels and you’ll always win some gold no matter what. If you do manage to get 2 or 3 of the same kind, you’ll win even more gold, but I’ve never gotten 3 of a kind in any of these minigames in the entire DragonScales series…they’ve apparently made getting 2 of the same easier in this game though.
2-6: No gravity. First shielded enemies in battles. Match over all those hammers ASAP because the enemies are immune to all attacks until their shields have been depleted by the hammers. Don’t forget about the free spell and star.
2-7: No gravity. Break those rocks first to get to the hammers, then try to get that coin bag for the extra gold. The question mark on the left is relatively easy to get if you focus on clearing the rocks around it so you can get the hammer there too. Sadly, the spiky mace spell you get here usually doesn’t work on the enemies as they can resist this spell even though they don’t have mystic rings. You’re better off using your restore hit points spells since they attack you pretty frequently.
2-8: No gravity. Focus on killing the brown mage first, as Stone Yoda doesn’t directly attack you – he just drops more stones into the board every so often. As long as you don’t get fenced in, this isn’t too bad. Don’t forget about the assorted goodies to collect.
2-9: Gravity is downwards. Work on the enemy in the middle of the lineup first. The coin bag and star are immune to gravity but you’re going to have to build some “towers” up to get everything.
2-10: Gravity is downwards. Build your way upwards to get all the hammers and goodies. Hammers are immune to gravity. Who gets unshielded first is a matter of luck, but if you have a choice between attacking the Stone Yoda guys or one of the other 2, pick the other enemies first if they don’t have a shield.
2-11: Gravity is downwards. Here, you want to drop the hammers off the bottom as you can’t put scales on top of gravity based hammers. Carefully clear out the patterned scales, then the other ones in the way.
Jigsaw puzzle #2 appears in between 2-11 and 2-12.
2-12: Gravity is downwards. The hammers are gravity based once again. The trick to getting the patterned scales out of the way without blocking off the hammers is to build “towers” in the adjacent columns to build up to the patterned scales from the side so the spots underneath the patterned scales stay clear for the hammers to fall. As to which enemy to attack first, it’s a tossup since the vampire warrior brings in backups and the mages heal themselves and everyone can directly attack you.
3-1: No gravity. Keep the bottom clear, as you first need to shift the icon over one column and then keep using the up arrow spot until the icon is one space away from the portal. Then use the appropriate column shifting arrow to get to the portal. Don’t put scales in front of the icon or you’ll block the pathway. Ignore all the arrows on the top because using those just makes life hard.
3-2: No gravity. The rocks are blocking the icon, so you first have to clear those before using the arrows.
3-3: No gravity. You should be able to figure this one out.
3-4: No gravity. Sort of convoluted but as long as you ignore the arrows on the top and don’t place scales in front of the icon where you need to move next, you should be OK.
3-5: No gravity. Work on the rocks near the icon before deciding how to “walk” with the arrows depending on which rock clears first.
Pick an icon minigame #2 appears between 3-5 and 3-6.
3-6: No gravity. Here are the first enemies who are color specific. Only matches of their eye color will hurt them, but I’ve found you don’t have to select an enemy for a match to count. As long as there’s a susceptible enemy in the lineup and you make a match of that color, it will automatically hit them. Don’t forget about the bonus coin bag. The 4 enemies attack a lot, so be as efficient with your matches as possible. You don’t have to focus on a specific color, just keep on matching as often as you can. When 1 or 2 of the enemies are gone, then you’ll have to pay more attention to what color your matches are to clear the remaining enemies.
3-7: No gravity. Try to get that star even though it requires breaking more rocks as getting a manual upgrade to your battle skills is always worth it. The hammers are also hemmed in by rocks, but at least most or all the colored eye guys will get hit while you’re working on all the goodies. Try to save the multi-lightning spell you get from the question mark until all the mages have been unshielded. With this big an enemy lineup, hopefully you have some of the apple or turnip spells left from earlier levels; the dragon shield spell is also quite useful.
3-8: No gravity. Since the glowing spots move around, the trick to getting the hammers is to get 2 of the same color over the hammer and an adjacent non-moving spot first, then wait for a scale set with the matching color to put onto the moving spot for the match or an open non-moving space if there’s one available. Don’t plug up the moving spaces with extraneous scales or you risk having those scales block the hammer later when you’re trying to match it. This requires some clearing out moves before you can build your way in with getting the 2nd scale in place on the non-moving spot next to the hammer. There’s also a coin bag to get while you’re working on making the hammer setups. This one’s surprisingly tricky since it takes a while to get the setups made; you’ll want some apple or turnip spells since it takes a while to unshield all the enemies and they’re bashing on you regularly.
3-9: No gravity. The purple alien will periodically turn your next scale set into black scales which don’t match anything and get in the way. They vanish after 5 more moves, so put them into a corner somewhere when they show up so they’re not too much a blockage. I actually found the hard part of this board is getting all 4 spells from the question marks before the enemy dies!
3-10: No gravity. You have to trip the arrow before the bomb is accessible, then explode the bomb by matching over it before you can get all the hammers. Stone Girl won’t attack you directly, but changes your next scale set into a stone set every so often. Don’t forget about that coin bag.
3-11: Gravity is upwards. If you want the star, get the hammer and patterned scale above it first so the flying scales don’t wall them off. Otherwise, this is a matter of getting scales to fly into the right spots and splitting scale sets so you’re not fenced in. Put Stone Girl’s rock sets into open columns after the hammers are cleared out of them.
3-12: Gravity is upwards. All the colored minions have to be cleared off the board along with killing the enemy up top to finish. Try to get it so 2 of the same color are touching more than 1 minion of that color if possible to be more efficient with minion-clearing matches. The enemy has a mystic ring but isn’t really all that tough.
Memory card minigame #2 appears between 3-12 and 4-1.
4-1: Gravity is upwards. As long as you use the spots carefully so things don’t go flying too much, shouldn’t be too terrible. Try to clear the runes in the middle from the bottom up.
4-2: Gravity is upwards. Get the upper row of runes and all the patterned scales out before touching any of the lower runes so stuff doesn’t fly up and wall off critical scales to clear. Clear the lower runes by working from underneath of them if possible.
4-3: Gravity is upwards. You have to play your scales beneath the blocked spots and have them fly into place for the matches, but as long as you aren’t misplacing too many things it’s not that bad.
4-4: Gravity is upwards. Don’t touch the runes until you’ve cleared all the patterned scales. Work the stuff on top first, then the bottom row.
4-5: Gravity is upwards. Work generally from the bottom up starting from the bottom left corner going towards the right. When most of the things on the bottom are gone, work on the top right corner, then the blue patterned scale on the lower right side. The runes will prevent “flying” if used strategically.
4-6: Gravity is upwards, and the hammers are gravity based, so you have to get them to fly up to go off the screen. Start from the right side of the blue patterned scale in the middle and drop things into place to match the patterned scales out, gradually working your way towards the left until all the hammers are gone. Don’t forget about the 3 free spells on the bottom right; I didn’t need the chain spells awarded here until much later, but they will come in handy near the end of the game.
Jigsaw puzzle #3 appears between 4-6 and X-2.
X-2: Gravity is downwards. Pink on the bottom space of 3rd column (middle one), blue on the bottom space of 2nd column from left, and red immediately on top of the blue. Green on 2nd space from top of 3rd column (middle one), then the red and blue straight down underneath it.
4-7: Gravity is upwards to start. Use the gravity changing arrow in the middle right away to get the hammer to drop down on top of the patterned scales, then clear the patterned scales using the downward gravity. If you’re like me, you’ll find downwards gravity to be considerably easier than upwards to play.
4-8: Gravity is upwards to start. This is a very tricky level and I actually got stuck the first time I saw it before the solution suddenly occurred to me as I was rushing off to work. Use the upper set of gravity changing arrows since those are easier to reach in the beginning to switch gravity downwards. Then place 2 pink scales on top of the hammer on the left side, and 2 red scales atop the hammer on the right side. Do NOT put anything into the outermost columns except these 2 pairs of scales mentioned. Use the gravity changing arrows on the bottom to switch gravity back up, which will then cause everything to fly into the patterned scales and the 2 hammers to fly off the screen too. Now you can finish attacking the enemy with your moves (he’s got a mystic ring so don’t try any killing spells or the garden trowel spell either).
4-9: Gravity is upwards to start. This is another really tricky level with how you have to switch gravity at the right moments. Clear the green patterned scale in the middle for the first hammer, then work on the green patterned scale on the bottom left and the blue and the pink patterned scale on the right. The 2 hammers on the right will fly up under the red patterned scale and you’ll still have 2 hammers underneath red patterned scales on the left side. Now put just 2 green scales immediately underneath the 2 hammers on the right side. Do NOT put anything else into that column. Then use one of the gravity changing arrows (I picked the one near the top right corner since it’s easiest to reach with upwards gravity) to switch to gravity down and drop 3 hammers out. At this point all but 1 enemy is unshielded, so start working on matches to clear the patterned and other scales from the bottom to whack the enemies. You’ll have to work your way into the bottom left corner starting from the right to get that last hammer to unshield the last enemy. Save the patterned scales remaining on the top parts until all the enemies have been killed. Switch gravity back to upwards using another set of arrows when all the enemies are gone to make getting those patterned scales easier. The red patterned scale on the right side isn’t too hard with dropping 2 scales into place, but for the left side, do the single blue scale first and then carefully drop scales into place for the last 4 on the top left. Whew!
4-10: Gravity is upwards. Clear out the patterned scales in the top corners before working on the 2 yellow scales on the bottom corners. Make sure the outer columns are clear so the hammers can fly out while getting the patterned scales in the corners. Don’t forget about the star and free spell on the bottom, but do them after you get the hammers. Get the mages first if possible, then focus attacks on the vampire warrior, then finally any minions the vampire warrior called in.
4-11: Gravity is downwards. The blue mages will heal themselves and their partner, but since they don’t attack you directly as much as some of the other guys, are simply more persistent. It’s OK since it will take a while to get all the hammers. Get the star first, but do not clear any of the patterned scales on the top row while doing it. Get the patterned scales on the bottom middle next, then clear out all the spaces in that column under the blue and green patterned scales. Get the green patterned scale by building up from an adjacent column and get the blue scale on the top in the same way so the hammer falls out. Clean up the scales on the top left including the blue and pink patterned scales, leaving as much space open on the left side as you can. The best situation is to have the 2 far left columns completely open except for the patterned scales at the bottom. The hammer falls on top of the pink patterned scale in the bottom left corner, so you’ll have to clear out the green patterned scale by it first without plugging up the space again so you can then drop 2 pink scales into place for the pink patterned scale. Then depending on what scale sets you get next, either start working on the rocks on the right or carefully drop scales into place for the patterned scales on the bottom left corner. Do not clear any of the patterned scales on the top right yet. After mining your way through all the rocks on the right, clear out all the patterned scales on the bottom right, then clear out all the spaces in the columns with the hammers except for the patterned scales. Build “towers” up to the red and pink patterned scales from an adjacent column so the hammers will drop out when the scales are matched. Now you can finally get those mages!
4-12: Gravity is upwards. Get the star first, then focus attacks on the blue mages, then the vampire warrior and finally the woman and any backups the vampire warrior called in.
Memory card minigame #3 appears between 4-12 and 5-1.
5-1: Gravity is downwards. As you clear the patterned scales, use the empty spaces/areas left behind to dump unwanted scales into while you’re working on the other patterned scales.
5-2: Gravity is downwards. While working on the upper patterned scales and runes, be careful not to block off the bottom patterned scales too much with the wrong colors. If you’ve got a choice between getting one of the higher items or a bottom patterned scale it’s usually better to clear the bottom patterned scale first.
5-3: Gravity is downwards. The rocks get in the way, so just put stuff there to mine through them first, but a clever strategy is to set up the matching colors for the patterned scales atop your rock breaking matches so the cascades will get the patterned scales for you.
5-4: Gravity is downwards. Use the runes to block scales from falling to make clearing the assorted patterned scales easier. When all the patterned scales are gone, then do the runes.
X-3: Gravity is downwards. Put the green atop the red scale in the 4th column from the left, then the pink and blue into the 5th column from the left so they fall down to the bottom (make sure you have it with pink atop blue at the bottom). Then pink atop the pink patterned scale, blue and green into the 5th column from the left where the blue is by the blue patterned scale and green is on top.
5-5: Gravity is downwards. Get the 2 patterned scales in the bottom corners before working on all the other stuff. Otherwise, just work from the bottom up.
5-6: No gravity. Focus your attacks on the mage first before the purple alien and put the black scales into open corners. It can actually be hard to get the star and both spells before the enemies die!
Pick an icon minigame #3 appears between 5-6 and 5-7.
5-7: No gravity. Trip the down arrow on the left first to lower the bomb. While you’re setting up the match for this arrow, note that the other 2 arrows point up to the “trick” spots you need to place red scales upon, so put red scales onto those single spots that are in the same column as the up arrows which are closest to the red patterned scale at the top. If you aren’t getting the right scales to trip the down arrow at this point, go get the free spell from the question mark and the star on the right side. When you have tripped the down arrow on the left, explode the bomb by matching over it. This breaks the brick wall blocking the hammer. Then either get the hammer you just freed, or trip the remaining arrows. One of the mages might get killed while you’re doing this, but as soon as all the hammers are gone, just bash away at the mages until you’re done.
5-8: No gravity. Focus your attacks on the blue mage until he dies since he will heal the other guys and the other 2 don’t attack you directly anyway. Don’t forget about all the goodies on this one.
5-9: Gravity is downwards. Focus your attacks on the blue mage as the color matches will automatically apply to the colored eye guys anyway. When there aren’t too many colored eye guys left, then you’ll have to watch your matches more carefully and pick the specific matches. Don’t forget about the star and coin bag.
5-10: Gravity is downwards. Try to get Stone Girl before the Stone Yoda guys since the girl is more annoying with giving you stone sets. This one may be slightly harder than some other battles even though the enemies don’t remove your hit points just because your scale sets are 4 scales long so locking the board is a potential issue. Don’t forget about the coin bag on the top right.
5-11: Gravity is downwards. Work on just one of the patterned scales on the top left corner at a time. I got rid of the one immediately underneath the hammer so I could put a matching scale for the other patterned scale over the hammer since the hammer is immune to gravity. If you can, get rid of the female warrior before the purple alien.
5-12: Gravity is downwards. Zinebra has a lot of hit points, but as long as you persevere and match regularly, you should be OK. Get all the hammers ASAP. Using the red potion spell (not the red liquid in test tube, that insta-charges your arts) to restore all your hit points if you’re about to die is really useful, and by this point of the game you should also have quite a lot of gold coins assuming you already have the village built, so can buy a few more spells from the shop if needed. If she’s doing the super attack on you taking away about a third of your hit points a lot, you can also use the chain spell to silence her for a round, but I only needed one red potion spell to finish this one.
Jigsaw puzzle #4 appears between 5-12 and 6-1.
6-1: No gravity. The down arrows are pointing to the “trick” spots to put red scales upon, so get red scales into those 2 singleton spaces furthest away from the arrows before tripping the arrows.
X-4: Gravity is downwards. Blue in between the 2 blue patterned scales in the 2nd column from the left, green on top of the green patterned scale, red on top of the green you just placed. Green on top of the pink patterned scale, pink on top of the green you just placed, red on top of the red in the center column.
6-2: No gravity. Here, you have to clear out the rocks before you can reach the arrows, but they are still pointing at the “trick” spots to put the matching colors for the patterned scales which are furthest away from the arrows. Put a blue scale onto the singleton spot in the top left corner for the blue patterned scale. A pink scale goes in the single spot above the hole where the middle arrow points (you have to get rid of the rocks first to reach it), and 2 red scales go in the top 2 spaces of the 2nd column from the right for the red patterned scale. For the pink patterned scale in the top center, you also have to get a scale set with pink on the end and put a pink scale immediately next to the pink patterned scale in the “island”. Then trip all the arrows to match everything. You can figure out the rest.
6-3: No gravity. The arrows point to the 2 spots you have to put green scales upon, so put green scales into the single spaces under or over the holes where the arrows point before tripping the arrows. You should be able to take it from there.
6-4: No gravity. Start by exploding at least one of the 3 bombs on the top half of the board so the arrow is accessible. I usually blow all 3 up just to make it super easy to reach. Do NOT explode the bomb on the left side. Trip the arrow, which lowers the last bomb down 1 row. Now it’s aligned with the brick wall blocking off the last 2 patterned scales, so explode it and get the last 2 scales.
6-5: No gravity. As the dragon states, if you don’t trip things in the correct sequence this board will be impossible. Start by tripping the arrow on the top left. This lowers the bomb on the left 1 row. Explode the bomb on the left to break the brick wall blocking the arrow on the lower right. Now trip the arrow on the bottom right (the one you just freed). This drops everything on the far right down 1 column, but now you still have to trip the last arrow to get the bomb in the correct location. So trip the last arrow, then explode the bomb to clear the last brick wall. The red patterned scale is now accessible.
Pick an icon minigame #4 appears between 6-5 and 6-6.
6-6: No gravity. The secret to getting the hammers is to put a color onto the hammer which matches one of the color specific spots by it. If you put some other color which doesn’t match, the board is impossible. For example, the bottom right corner has pink and red only spots next to the hammer. So you have to pick either a pink or red scale to go onto the hammer in a scale set which has the middle color matching the “other” color specific space. To keep using this example, say I get a scale set which is pink, red, something else. I would put the pink scale onto the hammer on the bottom right, the red scale into the red specific spot, and the something else in a spot which doesn’t block the pink specific spot of the board. Then I would wait until I got another 2 scale sets with pink in them and put the pink into the pink specific spot and the last pink to match the 2 pinks to get the hammer off the bottom right. The other hammers are collected with a similar strategy using different colors based upon the color specific spots around them. At least the single enemy here doesn’t directly attack you too often – her removing scales attacks can actually be a help sometimes.
6-7: No gravity. Here, the hammers randomly move around the board with your moves. If the board fills up enough, the hammers will stop moving, but typically they’re not too hard to catch. Put something onto the hammers ASAP, and when they move around, the scale on them will go too so you only need to keep trying to match them and will catch them eventually.
6-8: No gravity. Trip the arrow on the top right first. This lowers the bomb to align it with the brick wall on the bottom left corner. Explode the bomb to free the arrow in the bottom left corner. Trip the arrow to raise the remaining bomb. Build your way into exploding the last bomb. This clears out the brick wall blocking the last hammer. At least the gold helmet guy here doesn’t directly attack you too much since it will take a while to get that hammer; the mage will die while you’re working on all the earlier stuff.
6-9: No gravity. Get the star and free spell and focus attacks on the blue mage first. You don’t get directly attacked much if at all in this one. The biggest hazard is you locking up the board since the scale sets are 4 long and the black scales already on the board don’t ever go away.
6-10: No gravity. Explode the bomb in the bottom left corner to free the bottom right corner, then work your way into getting the key. As soon as you’ve gotten the key, click on the lock in the board to clear it. Now you can get the hammer; don’t forget about the star and coin bag.
6-11: No gravity. Work your way into getting the 2 keys ASAP then clear the locks. The huge lineup of enemies bashes the heck out of you, so you’ll want at least 1 red potion spell here; wait until you’re about to die before using one. But otherwise try to get a match as often as you can to hit the colored eye guys regularly and get rid of them all while you’re working on getting the hammers.
Memory card minigame #4 appears between 6-11 and 6-12.
6-12: No gravity. Sneaky arrangement of locks and keys; if you pick the wrong lock to clear first the board is impossible. Get the key from the top left corner and click the lock in the bottom center that has a key next to it so you can get the remaining key. After getting that last key, click the remaining lock on the bottom left corner. Now all the hammers are free.
7-1: No gravity. You’ll have to break the rocks to get to the arrows, but should be able to figure this one out.
7-2: No gravity. The arrows are in tight spots but you can pick any/all of them to use and free up blocked ones as needed until you’re done.
7-3: No gravity. The arrows are pointing to the “trick” spots to use, so put pink underneath the hole in the column with the arrow on the left side. Put blue on the single spot sticking out on the 3rd column from the right. Then you have to place pink onto the arrows on the bottom left “island” and blue onto the arrows on the top right “island”. When you’ve got these setups all created, trip both arrows to finish.
7-4: No gravity. Break out the rocks and go from there with the arrows. Clear out any scales blocking the icon’s path.
7-5: No gravity. Trip the arrows from left to right so all the board sections will be connected. Then clear out the rocks from the arrows along with those blocking the icon, and walk the icon over to the portal as usual.
Pick an icon minigame #5 appears between 7-5 and 7-6.
7-6: No gravity. While working on getting the free spell and coin bag, avoid matching over the green potion bottles the wolf throws onto the board, as matching over a green potion bottle gives the enemy back hit points. Otherwise, this is a pretty easy battle.
7-7: No gravity. Focus your attacks on the mage first, but when the robot eyeball throws its bombs onto the board, try to match those out within the 5 moves so they don’t explode and take your hit points. Don’t forget about the goodies here.
7-8: No gravity. The scale sets are 4 long, so locking the board is a potential issue but otherwise this isn’t too tough. Still worth getting that star for the manual upgrade.
7-9: No gravity. Get the 2 keys first so you can clear the locks blocking the hammers. Focus your attacks on the vampire warrior, then the woman and finally Stone Girl if possible. Save the patterned scales on the 2nd column from the left for when all the enemies are gone.
7-10: No gravity. The hammers move around randomly but you can figure this one out.
7-11: No gravity. Focus your attacks on the snow lady in the middle first. Don’t forget about all the goodies.
Memory card minigame #5 appears between 7-11 and 7-12.
7-12: Gravity is downwards. Get the hammers ASAP. Since Aaron has a ton of hit points, if you happen to get unlucky with him doing 2 super attacks (takes away about 1/3 of your hit points per super attack) early on when he’s still got a few thousand hit points, use the chain spell after he’s directly hit you twice to keep him from killing you. Assuming you have the village completed, you get 9 turns before Aaron gets a crack at you, so shouldn’t need the chain spell more than 1-2 times. Buy a red potion spell from the shop if needed. Aaron does a multitude of attacks so will not always directly attack you. Sometimes you can beat up on him for quite some time before he super attacks.
8-1: Gravity is upwards. The runes and lower patterned scales block the pathways to the top row of patterned scales, so work on getting the stuff in the middle first but try not to wall yourself off.
X-5: Gravity is downwards to start. Blue on the arrows, red on the 2nd space from the bottom of the 5th column from the right, pink underneath the blue. Blue immediately underneath the blues, green atop the red, pink in the column under the green patterned scale. Gravity now shifts to upwards. Green under the pink in the 5th column from the left, pink in the 2nd spot from the bottom of the 5th column from the right, red on top of the pink you just placed.
8-2: Gravity is upwards. Try to get the runes before focusing on the patterned scales, but some of the patterned scales will likely go away while you’re working on clearing out room to work with the longer scale sets. Getting cascades set up is extremely useful.
8-3: Gravity is upwards. Clear out some of the blocking runes first so you can get single scales to fly up to the patterned ones with careful scale set splitting. As soon as you have an opening, start working on the patterned scales you can reach and clear out any other extraneous scales to keep from locking the board or fencing yourself in. Keep doing this cycle with clearing some runes, then some of the patterned scales until you’re done.
8-4: Gravity is upwards. Use the 2 runes on the outer edges to keep things from “flying” too much while getting the patterned scales in the corners. After the red and blue patterned scales from the 2 corners are gone, work generally from the bottom up with clearing the runes and remaining patterned scales.
8-5: Gravity is upwards. Work on all the patterned scales in the top row by carefully dropping single matching scales either through the blocked spaces or down that center column. Use the runes and patterned scales in the bottom half as blocks to prevent excessive “flying”. Then get the runes starting with the ones in the upper half before doing any left in the bottom half and finally the patterned scales in the bottom half.
Pick an icon minigame #6 appears between 8-5 and 8-6.
8-6: Gravity is downwards. Get the 3 hammers which are reachable (left, bottom center and top right). Then clear out both patterned scales from the top right corner so there’s a free space to drop green scales down the blocked spaces until the last hammer is obtained. Don’t forget about the star on the top center. Check that your attacks are focused on the vampire warriors since the game wants to put your attacks on the minions called in by the vampire warriors instead. Once the vampire warriors are gone, take care of whoever’s left.
8-7: No gravity. Break the rocks and get the hammers first and try to kill the robot eye first if you can. Even though the key is not required, it’s still worth it to unlock the star for the manual upgrade. Tip: if you managed to clear the lock in the board but killed the enemies before the star could be obtained, replaying the board will not have the lock there anymore to make getting the star easier on the retry.
8-8: No gravity. The scale sets are 5 long, which makes locking the board a major concern. As long as you don’t fence yourself in, you can get multiple matches easier with these scale sets. Don’t forget about the coin bag. Try to kill the blue mages before the vampire warrior and finally any backups called in.
8-9: No gravity. Get the hammers first, then target your attacks on the robot eye followed by the wolf and finally the purple alien if you can.
8-10: Gravity is downwards. Remember that the hammers have to actually have a scale placed onto them, so you can’t drop scales in on top. You’ll have to place a scale set into each of the corridors and clear your way back out before building in again to get the hammers in the bottom corners. This one’s a tossup on who to attack first as all the enemies are equally annoying. Tip: if you have to match over a green potion bottle, try to save that match for an enemy who’s still shielded since the shielded enemy already has a full hit point allotment and won’t get more for green potions.
8-11: No gravity, but the 2 snow ladies can throw a lot of bombs. Focus your attacks on only one of them at a time and if you’re lucky with getting enough critical attacks, you can kill one before they get a chance to attack you. You won’t be able to match out every bomb thrown onto the board, but try to get whatever you can before they explode.
Memory card minigame #6 appears between 8-11 and 8-12.
8-12: No gravity. I found using the chain spell a couple of times makes this battle pretty easy, but if you want it to go faster, you can use a lightning spell or the golden fist spell just because Meister has so many hit points it takes a while to beat him. He is one of just 2 enemies I saw in the whole game who can pull the Confusion attack. This attack causes all the scales to be hidden with black covers for a while. Just keep on putting the covered scales into the board and if something happens to match, it will still count as an attack.
Fallen Shadows section: 4 extra battles on the level selection screen which don’t unlock until you’ve finished the main game. By this point of the game, you should have an obnoxious stash of gold coins (I always have well over 80,000 at game’s end). So if you’re stuck on these battles somehow, just go to the shop and go crazy on spells. The bonus stages are numbered starting with “sh”.
Observant players will notice that the end game screen says 101/105 levels were done when they first get the “end game” sequence. This is because the Fallen Shadows section hasn’t been played yet, so if you want to truly complete the game and get all the trophies, you have to beat the bonus battles. The “end game” sequence will display again once you complete all of Fallen Shadows.
All your amassed upgrades and spells left over from the regular game will carry over to Fallen Shadows.
Sh-1: Gravity is upwards. This enemy is actually super easy to beat because she mostly throws green potion bottles onto the board and doesn’t directly attack much, so just keep matching at the top avoiding the bottles until you’re done.
Sh-2: Gravity is upwards. Match as often as possible at the top of the board; it’s a matter of persistence. The enemy throws a lot of bombs on the board and you typically can’t match them all out, but they can move with the gravity so sometimes things aren’t as bad as they seem.
Sh-3: Gravity is upwards. This enemy is the only other one besides Meister who can pull the Confusion attack, and she can do it multiple times in a row. I haven’t ever had to resort to using the feathered mask spell which gets rid of all scales on the board, but may be something to try if the board gets overly full.
Sh-4: Gravity is upwards. Longtime DragonScales fans will remember Kreuss from earlier games. He’s still a serious pain here and really the only bonus enemy you’ll need your spells on. I find the chain, red potion and lightning spells to be the most useful.
The End!
P.S. Here’s a solution for Level 5-7 of DragonScales 7: